


User guide

HTC Desire V 8
Dual SIM cards 10
Switching the power on or off 13
Setting up HTC Desire V for the first time 14
Want some quick guidance on using your phone? 14
Features you'll enjoy on HTC Desire V 15
Getting contacts into HTC Desire V 19
Making your first call 19
Sending your first text message 20
Getting photos, videos, and music on or off HTC Desire V 20
Copying and sharing text 21
Capturing the HTC Desire V screen 22
Switching between recently opened apps 22
Getting to know your settings 24
Getting the battery to last longer 24
Updating the HTC Desire V software 24
Syncing your media and data with HTC Sync Manager 25
Taking a photo 27
Improving portrait shots 27
Shooting in low light 28
Changing camera and video settings 28
Making HTC Desire V truly yours 29

Personalizing HTC Desire V with scenes 29
Changing your wallpaper 30
Applying a new skin 30
Personalizing your Home screen with widgets 31
Adding apps and other shortcuts on your Home screen 32
Rearranging or removing widgets and icons on your Home screen 32
Personalizing the launch bar 33
Grouping apps into a folder 33
Personalizing with sound sets 34
Rearranging application tabs 35
Making a call with Smart dial 36
Using Speed dial 36
Calling a phone number in a text message 37
Calling a phone number in an email 37
Calling a phone number in a Calendar event 37
Making an emergency call 37
What can I do during a call? 39
Setting up a conference call 40
About the Messages app 43
Sending a text message (SMS) 43
Sending a multimedia message (MMS) 43
Resuming a draft message 45
Checking your messages 45
Replying to a message 46
Forwarding a message 47
WAP push messages 47
Managing message conversations 48
Backing up your text messages 49
Setting message options 50
Searching HTC Desire V and the Web 51
Browsing the Web 51
Adding and managing your bookmarks 53
Saving web content for later 54
Viewing your browsing history 54
Downloading files and apps 55
Setting browser options 56

Adding your social networks, email accounts, and more 68
Adding one or more Google Accounts 68
Managing your online accounts 69
About the People app 70
Your contacts list 70
Setting up your profile 71
Adding a new contact 72
Importing or copying contacts 72
Merging contact information 73
Contact information and conversations 74
Adding People widgets 76
Sending contact information 77
Backing up your contacts to the storage card 77
Facebook for HTC Sense 79
About Friend Stream 79
Updating your status in Friend Stream 79
Enjoying Facebook in Friend Stream 80
Chatting in Google Talk 81
Calendar
Creating an event 90
Viewing the Calendar 90
Managing Calendar events 91
Accepting or declining a meeting invitation 92
Setting reminders for your events 93
Dismissing or snoozing event reminders 93
Showing or hiding calendars 93
Changing Calendar settings 93
HTC Car
On the road with HTC Car 101
Playing music in HTC Car 101

Finding your way with HTC Car 102
Staying connected to your contacts 103
Changing HTC Car settings 103
Essential apps
Using the Clock 117
Working on documents 120
Getting apps from Google Play 125
Watching videos on YouTube 126
Recording voice clips 127
Sharing games and apps 127
Where apps, data, and files are stored 128
Connecting HTC Desire V to a computer 128
Copying files to or from the storage card 129
HTC Sync Manager basics 129
Playing music in HTC Sync Manager 133
Viewing photos and videos in HTC Sync Manager 134
Setting up HTC Sync Manager to recognize HTC Desire V 135
Setting up HTC Desire V to sync with your computer 135
Syncing HTC Desire V and your computer 139
Ripping music from a CD with HTC Sync Manager 139
Sharing your mobile data connection by USB tethering 140
Connecting to the Internet through a computer 140
Connecting to a virtual private network (VPN) 143
Using HTC Desire V as a wireless router 144
Connecting a Bluetooth headset or car kit 146
Disconnecting or unpairing from a Bluetooth device 147
Sending information using Bluetooth 148
Receiving information using Bluetooth 149

Turning Airplane mode on or off 151
Changing display settings 151
Changing sound settings 152
Changing the display language 153
More ways to extend battery life 154
Backing up settings to Google 154
Protecting your SIM card with a PIN 155
Protecting HTC Desire V with a screen lock 155
Encrypting data on HTC Desire V 156
Checking information about HTC Desire V 157
Managing your mobile networks 157
Using the onscreen keyboard 161
Entering words with predictive text 162
Entering text by speaking 164
Restarting HTC Desire V 164
Resetting HTC Desire V 164
Index

7 Conventions used in this guide
In this user guide, we use the following symbols to indicate useful and important information:
This is a note. A note often gives additional information, such as what happens when you choose to do or not to do a certain action. A note also provides information that may only be applicable to some situations.
This is a tip. A tip gives you an alternative way to do a particular step or procedure, or lets you know of an option that you may find helpful.
This indicates important information that you need in order to accomplish a certain task or to get a feature to work properly.
This provides safety precaution information, that is, information that you need to be careful about to prevent potential problems.

HTC Desire V
2. HOME
3. RECENT APPS
4. VOLUME
§ If you want to use a screen protector, please don’t cover and block the proximity
sensor. You can purchase the dedicated screen protector for HTC Desire V that already has a small opening for the sensor.
§ You need to insert and use a storage card to store your photos, videos, music, and
other files.
8 Unboxing

Removing the back cover

Replacing the back cover


You will hear a click when the back cover is locked in place.
9 Unboxing

HTC Desire V has two SIM slots that allow you to insert up to two GSM SIM cards.
Inserting the SIM cards

When inserting, make sure the gold contacts on the SIM card are facing down and the cut-off corner is facing out. Slot 1 is near the camera lens.

Removing the SIM cards

Make sure to switch off HTC Desire V before removing your SIM cards.
10 Unboxing

Use a storage card to store your photos, videos, and music.
Inserting the storage card

Unmounting the storage card
When you need to remove the storage card while HTC Desire V is on, unmount the storage card first to prevent corrupting or damaging the files in the storage card.
Removing the storage card

11 Unboxing

Before using HTC Desire V for the first time, you need to remove the protective thin film from the battery.


Please use only original batteries that came in the box or replacements that we recommend.

12 Unboxing · Removing the battery · Inserting the battery

Before you turn on and start using HTC Desire V, it is recommended that you charge the battery.

§ The battery is already installed in HTC Desire V when shipped. A thin film is
inserted between the battery and the compartment. You need to remove this film before you can charge the battery.
§ Only the power adapter and USB cable provided in the box must be used to
§ Do not remove the battery from HTC Desire V while you are charging it using the
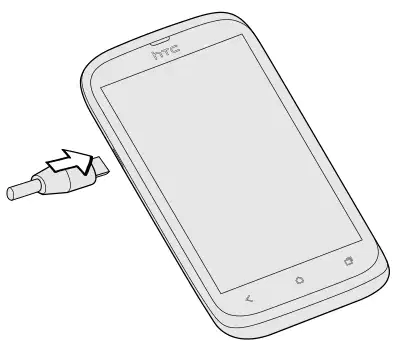
As a safety precaution, the battery stops charging if it overheats.
Switching the power on
Press the POWER button. Easy.
When you turn on HTC Desire V for the first time, you’ll need to set it up.
13 Unboxing · Charging the battery

Switching the power off
When you switch on HTC Desire V for the first time, you’ll be asked to set it up.
Just follow the onscreen instructions and you’ll be up and running in no time.
Some features that need to connect to the Internet such as location-based services and auto-sync of your online accounts may incur extra data fees. Don’t worry. You can enable or disable them in settings later on.
When HTC Desire V has started, you'll see Quick Tips on some screens (such as the Home screen) that will guide you in using HTC Desire V. The tips for a screen won't display again after you've closed them.
To view the Quick Tips again, slide the Notifications panel open, and then tap
> About > Help > Show all quick tips.
Show Me helps you get the most out of HTC Desire V in seconds.
§ Need to know how to do something right away? Just type in some keywords and get clear, up-to-date answers right on HTC Desire V.
§ Ever have the feeling that you're not getting the most out of your phone? Browse through the friendly walkthroughs on Show Me to learn how. The topics range from intro to advanced and the Show Me widget even recommends topics that you might like.
To open Show Me from the Home screen, tap
> Show Me.
If you haven't downloaded Show Me content yet, or if there's updated content available, just tap the download link to get it.
, and then enter the words you want to search for.
14 Unboxing · Searching Show Me

15 Your first week with your new phone
Features you'll enjoy on HTC Desire V
HTC Desire V gives you a fun camera, great sound experience, and more.
Shoot and share in seconds
Instantly upload photos to your favorite social network right after capturing. To find out more, see Changing camera and video settings on page 28.
You can also capture a photo from a previously recorded video. See Taking a photo while watching a video on page 58.
Beats By Dr. Dre Audio™
Beats Audio™ integration gives you a rich, authentic sound experience, whether you’re listening to music, watching a YouTube® video, or playing a game. To find out more, see Making your music sound better on page 65.
Dropbox integration with HTC Sense
Always have access to your photos, videos, and documents anywhere by storing them in Dropbox. When you set up your Dropbox account from HTC Desire V, you can even get an additional 23 GB of free Dropbox storage for two years. To find out how, see Using Dropbox on HTC Desire V on page 94.
If the Dropbox app is not preloaded, you can download it from Google Play.
With the HTC Car app, keep yourself entertained while finding your way on the road. You can use turn-by-turn navigation, browse maps, take calls, and listen to music or Internet radio. To find out more, see HTC Car on page 101.
Rich and seamless browsing experience
Enjoy HTML5 and Flash® content on the go. And no more panning left and right. The web browser's text reflow automatically adjusts text to the width of your screen. To find out more about using the web browser, see Browsing the Web on page 51.
You can also keep a copy of what you're browsing so you can read it later even without an Internet connection. See Saving web content for later on page 54.
HTC Car

16 Your first week with your new phone
The phone dialer’s Smart dial feature makes it quick and easy for you to place a call. Just enter the phone number or first few letters of the contact name. For more information about calling, see Phone calls on page 36.
Your Home screen is where you make HTC Desire V your own. You can add your favorite applications, shortcuts, folders and widgets so they’re always just a tap away. To find out how, see Personalizing on page 29.
As you start to do more things with HTC Desire V, you might find that one Home screen is not enough. No problem.
Slide your finger horizontally to the left or right on the screen and you’ll discover more space for adding icons, widgets, and more.
to return to the main Home screen.
Tap When you want to type using the keyboard, select items onscreen such as application and settings icons, or press onscreen buttons, simply tap them with your finger.
To open the available options for an item (for example, a contact or link in a webpage), simply press and hold the item.
To swipe or slide means to quickly drag your finger vertically or horizontally across the screen.
Drag Press and hold your finger with some pressure before you start to drag. While dragging, do not release your finger until you have reached the target position.
Flick Flicking the screen is similar to swiping, except that you need to swipe your finger in light, quicker strokes. This finger gesture is always in a vertical direction, such as when flicking the contacts or message list.
Rotate For most screens, you can automatically change the screen orientation from portrait to landscape by turning HTC Desire V sideways. When entering text, you can turn HTC Desire V sideways to bring up a bigger keyboard.

17 Your first week with your new phone
Pinch In some apps, like Gallery or the web browser, you can “pinch” the screen using two fingers (for example, thumb and index finger) to zoom in or zoom out when viewing a picture or a webpage.
In some apps that have sorting, like Mail or People, you can use two fingers to scroll the screen. The screen displays the sorting order, and you can easily scroll to the information you want.
Sleep mode saves battery power by putting HTC Desire V into a low power state while the display is off. It also stops accidental button presses when HTC Desire V is in your bag. You’ll still receive messages and calls though, and missed calls and messages appear on the lock screen.
To prevent missed calls or messages from appearing on the lock screen, slide the Notifications panel open, and then tap
> Privacy.
Switching to Sleep mode
Briefly press the POWER button to turn off the display and switch to Sleep mode. HTC Desire V also automatically goes into Sleep mode when it’s idle for a while.
Waking up from Sleep mode
To wake HTC Desire V up manually, press the POWER button. You’ll need to unlock the screen.
HTC Desire V automatically wakes up when you have an incoming call.
Two-finger scrolling

18 Your first week with your new phone
Pull the ring up to unlock the screen.

If you have set up a screen unlock pattern, pin, or password, you will be asked to draw the pattern on the screen or enter the PIN or password before it unlocks.
If you've set an event reminder or an alarm, you can drag
to the ring to snooze or dismiss the event or alarm.
Opening an app or folder from the lock screen
§ On the lock screen, drag an app or folder icon to the ring to unlock the screen and directly go to the app or folder.
The shortcuts on the lock screen are the same ones on your Home screen's launch bar. To change the lock screen shortcuts, replace the apps or folders on the launch bar.
§ When there's a notification or info shown on the lock screen such as a missed call or new message, you can drag it to the ring to directly go to its app.
Unlocking the screen · or

19 Your first week with your new phone
There are several ways you can add contacts to HTC Desire V. You can sync HTC Desire V with contacts from your Google® Account, computer, Facebook®, and more.
Sync with your computer
Sync the contacts from your old phone to your computer, and then use HTC Sync or HTC Sync Manager to sync HTC Desire V with your computer's Microsoft® Outlook®, Outlook Express or Windows® Contacts.
Gmail™ Google contacts are imported to HTC Desire V after you sign in to your Google Account. You can also create more Google contacts right from HTC Desire V.
Facebook Log in to your Facebook account to import your Facebook friends' contact information.
Phone contacts You can choose to create and store contacts directly in HTC Desire V or transfer existing ones from your old phone.
SIM card Copy all your SIM contacts to HTC Desire V.
Microsoft Exchange ActiveSync®
HTC Desire V syncs your work contacts from the Microsoft Exchange ActiveSync Server in your workplace.
Transfer Use the Transfer app to transfer not only your contacts, but also calendar events and text messages from your old phone to HTC Desire V.
Transferring contacts from your old phone
Easily transfer contacts from your old phone to HTC Desire V through Bluetooth®. Depending on your old phone’s model, you may also transfer other types of data such as calendar events and text messages to HTC Desire V.
> Transfer.

20 Your first week with your new phone
> Messages.
, and then select the contacts you want to send the message to.
to insert a smiley or add quick text.
There are two ways you can transfer your media.
§ Connect HTC Desire V to your computer, and select the Disk drive mode. Your computer will recognize it just like any removable USB drive, and you can copy your media between them.
§ Download and use our HTC Sync Manager software. You can easily set it up to sync folders containing media and playlists on your computer with HTC Desire V. HTC Sync Manager can also automatically get photos and videos off HTC Desire V to your computer.
Download and install HTC Sync Manager, when available, from our website. Or in the meantime, download and use the latest version of HTC Sync to sync your media and data.

21 Your first week with your new phone
In apps such as the web browser and Mail, you can select and copy text, and then paste or share it.

To copy the address of a linked webpage, press and hold the link, and then tap Copy link URL.
Copying and pasting text
The selected text is then copied to the clipboard.
Selecting text · Sharing text

22 Your first week with your new phone
Want to show off your high game score, write a blog post about HTC Desire V features, or post a status update about a song you're playing? It's easy to take a picture of the screen and share it from Gallery.
Press and hold POWER and then press
. The screen is saved in the Camera shots album in Gallery.
You can easily access apps you've just recently opened.
§ To remove an app from the list, drag it left or right.

§ To switch back to an app, just tap it.
The notification LED shows a:
§ Solid green light when HTC Desire V is connected to the power adapter or a computer and the battery is fully charged.
§ Flashing green light when you have a pending notification.
§ Solid orange light when the battery is being charged.
§ Flashing orange light when the battery level reaches very low.
Notification LED

23 Your first week with your new phone
Notification icons on the status bar make it easy for you to keep on top of your messages, calendar events, and alarms.
When you get a new notification, you can open the Notifications panel to see what event notification or new information you've received. The Notifications panel also lets you quickly access settings.

If you have several notifications, scroll down the screen to see them all.
Notification icons · Notifications panel

24 Your first week with your new phone
Want to change the ringtone, set up a Wi-Fi® connection or make the screen brighter? Do this and more in Settings.
Slide the Notifications panel open, and then tap
. Here are some of the basic settings you can change:
§ Tap the On/Off switch next to an item such as Wi-Fi to turn it on or off. Tap the item itself to configure its settings.
§ Tap Sound to set a ringtone, choose a sound profile, and configure incoming call sound settings.
§ Tap Display (or Display & gestures) to change the screen brightness or set how long the screen is idle before going to sleep.
§ Tap Security to set a screen or SIM card lock.
How long the battery can last before it needs recharging depends on how you use HTC Desire V. The features and accessories you use can affect battery life.
You can get the battery to last longer by following a few simple tips:
§ Turn off the display when you're not using it
§ Lower the volume
§ Close battery-intensive programs, such as the Camera, when you're done using them
§ Make sure apps are closed and not continuously running in the background
HTC Desire V can check and notify you if there’s a new software update available. You can then download and install the software update using the Wi-Fi or data connection. You can also manually check if there's an available software update.
Depending on the type of update, the update may erase all your personal data and customized settings, and also remove any applications you’ve installed. Make sure that you’ve backed up the information and files you want to keep.
You might want to use Wi-Fi to download software updates to avoid extra data fees.

25 Your first week with your new phone
When the Internet connection is on and there's a new update available, the system update dialog box appears and guides you through the process. If you don't see the dialog box, check for the update notification icon
in the status bar.
Wait for the update to finish. HTC Desire V will then restart automatically.
Checking for updates manually
With HTC Sync Manager, enjoy the same rich media whether you're at your computer or on the move. Use it also to store your same contacts, important documents, and other data on both HTC Desire V and your computer.
HTC Sync Manager is the replacement for HTC Sync, and it provides a lot more features. You can:
§ Play music and videos using the built-in player. You can also play iTunes® and Windows Media® Player playlists.
§ Manage your library of music, photos, and videos on your computer.
§ Get music from your CDs to your computer.
§ Sync photos, videos, music, playlists, and albums between HTC Desire V and your computer.
§ Sync information such as contacts, calendar, documents, and web bookmarks between HTC Desire V and your computer.
To find out how to install and use this software, see HTC Sync Manager basics on page 129.
Download and install HTC Sync Manager (when available) from www.htc.com/help Or in the meantime, download and use the latest version of HTC Sync to sync your media and data.
Installing an update

Camera basics
Capture photos instantly, with no delay. Just directly launch the camera from the lock screen, even if HTC Desire V is password protected.
From the Home screen, you can also tap Camera to launch it.
Use the controls on the Viewfinder screen to add effects, zoom in or out, and more.

After using Camera (or if you temporarily leave the Viewfinder screen), you still need to unlock HTC Desire V if you have a screen lock.
§ Before taking a photo or video, slide your finger on the zoom bar to zoom in or out.
§ When you're recording video, the zoom bar is always onscreen. You can freely zoom in or out while recording.
Use the available camera effects to make your photos look like they’ve been taken through special lenses or filters. You can also apply certain effects to videos.
26 Camera · Zooming · Choosing an effect

Choosing a flash mode
Tap the flash icon to choose a flash mode.
§ Freely zoom in or out.
§ Change focus to a different subject or area by just tapping it on the Viewfinder screen.
§ Tap the flash icon to turn the flash on or off.
Scenes provide an easy way to override your camera’s normal settings to suit your current lighting and environment. Use Auto and let the camera automatically determine optimal settings, or choose from a wide selection of scenes before you start taking photos.
If you'd like your family or friends to look their best in your photos, make sure to use the portrait scene. It smoothens the skin in your shots.
27 Camera · Setting the resolution

Capture stunning images even in dim light.
Flash is disabled when you're in this mode.
§ To avoid getting blurry photos, maintain a steady grip on HTC Desire V.
§ Improve your photo after taking the shot by applying special effects like auto
enhance and high contrast.
§ Change the review duration to set how long a captured photo or video will be displayed on the Review screen before the camera changes back to the Viewfinder screen.
§ Automatically take a shot when your subject smiles (photo mode only).
§ Geo-tag photos to store GPS location in your captured photos (photo mode only).
§ Set the ISO level. Higher ISO numbers are better for taking pictures in low light conditions (photo mode only).
§ Automatically upload photos to a social network (photo mode only). You can set the upload frequency, select the album to upload to, and set the privacy level.
28 Camera

Making HTC Desire V truly yours
Make HTC Desire V look and sound just the way you want it. Personalize it with a different wallpaper, skin, ringtone, and notification sound for events such as incoming text, email, and calendar reminders.
HTC Desire V becomes multiple phones in one when you use scenes. Scenes are personalized Home screen layouts that you can quickly apply. By switching between scenes, you instantly turn HTC Desire V into your perfect weekend phone, travel phone, work phone, or pure play phone.
Everytime you add or modify something on the Home screen, HTC Desire V automatically saves your changes to the current scene selected.
Creating a new scene
You’ll start with an empty Home screen when you create a new scene.
> Personalize.
> New.
> Personalize.
29 Personalizing · Renaming a scene

> Personalize.
> Delete.
Pick your favorite photo as your Home wallpaper. Choose from the available wallpapers, or use any photo you've taken with the camera.
> Personalize.
HTC wallpapers Choose a preset wallpaper, and then tap Preview.
Gallery Choose an existing photo and crop it.
Personalize beyond the Home screen by applying a new skin. Skins give a different look and feel to most onscreen buttons, application screens, option menus, and other items.
> Personalize.
30 Personalizing · Deleting scenes

Widgets put at-a-glance important information and media content up front on your Home screen. Some widgets are already added to your Home screen for your convenience. You can add more from the available selections of widgets.
Adding a widget to your Home screen
§ Slide left or right to browse through the complete set of widgets.
to search for specific widgets.
§ Tap All Widgets to choose from a selection menu.
Some widgets are available in different styles and sizes.
You can also add widgets that allow you to quickly switch on or off certain settings such as Wi-Fi and Bluetooth. Tap All Widgets > Settings, and then tap the widget that you want.
Changing the settings of a widget
You can modify basic settings of some widgets (for example, the People and Mail widgets) from the Home screen.


The relevant screen where you can change some settings for this widget then opens.
31 Personalizing

Some widgets can be resized after you've added them to your Home screen.
Place apps you often use on your Home screen. You can also add shortcuts to frequently used settings, bookmarked webpages, and more.
To add an app, you can also tap
, press and hold an app, and then drag it to an empty area on your Home screen.
Moving a widget or icon
§ You can pause at the left or right edge of the screen to drag the widget or icon
onto another Home screen panel.
§ When you drag a widget to a spot that’s already occupied by another widget or
icon, the occupant automatically moves away to give room.
Removing a widget or icon
32 Personalizing · Resizing a widget

The launch bar on your Home screen gives you one-touch access to commonly used apps. You can replace the apps on the launch bar with other apps you often use.

to go to the All apps screen.
§ You can also place shortcuts to settings or information on the launch bar. Add a
shortcut first to the Home screen, and then drag it to the launch bar.
§ The apps or shortcuts you see on the lock screen are the same as the ones on the
launch bar.
Use folders to group apps on the launch bar or your Home screen to free up space so you can add more apps.
You can also add shortcuts to settings or information. Add a shortcut first to the Home screen, and then drag it over to the folder.
33 Personalizing

Removing items from a folder
to remove. Repeat this process to remove more items from the folder.
If there's only one item left in the folder, the folder ungroups the last item and removes itself automatically.
Each sound set gives you a different combination of sounds for your ringtone and notifications such as incoming messages, email, calendar event reminders, and more. By switching between sound sets, you can instantly make HTC Desire V ring or alert you with fun sounds when you're out with friends or change to subtle sounds while you're at work.
Creating a sound set
> Personalize.
The newly created sound set is then added to the list of sound sets. You can assign different tones to the sound set to your preference.
Changing your ringtone, notifications, and sounds
> Personalize.
HTC Desire V automatically saves your choices to the current sound set.
34 Personalizing · Renaming a folder

> Personalize.
You can rearrange the tabs at the bottom of some apps to prioritize the types of information you frequently use. You can also add or remove tabs.
If you don't see any tabs on the app, tap
> Edit tabs.
§ Change the order of the tabs. Press and hold a tab, and then drag it to its new position.
§ Drag a tab into or out of the bottom row to add or remove it.

35 Personalizing · Deleting sound sets

Making a call with Smart dial
You can either dial a number directly, or use Smart dial to quickly place a call. Smart dial searches and calls a stored/synced contact or a number from your call history.
To choose from other phone numbers associated with the contact, tap
beside the contact name.
Use Speed dial to call a phone number quickly.
The number 1 key is generally reserved for your voicemail. Press and hold this key to call voicemail and retrieve your voicemail messages.
Assigning a speed dial key
> Speed dial.
, and then select a contact from the list.
36 Phone calls

To call the message sender, tap the received message, and then tap Call on the options menu.
To talk on the phone and view the calendar event info at the same time, switch the speaker on by tapping
In some regions, you can make emergency calls from HTC Desire V even if you don’t have a SIM card installed or your SIM card has been blocked.
When you receive a phone call from a contact, the Incoming call screen appears.
You can use the polite ringer and pocket mode features for receiving calls. To find out how, see Changing sound settings on page 152.
Do one of the following:
§ If the display is locked when you get a call, drag
to the Lock screen ring.
§ If the display is on when you get a call, tap Answer.
37 Phone calls · and tap · Answering a call

Do one of the following:
§ If the display is locked when you get a call, drag
to the Lock screen ring. Then drag to the ring the Remind me icon to create a task or the Send message icon to send a text message to the caller.
§ If the display is on when you get a call, tap Decline.
§ Press the POWER button twice to reject a call.
Muting the ringing sound without rejecting the call
Do one of the following:
§ Press the VOLUME DOWN or VOLUME UP button.
§ Press the POWER button.
§ Place HTC Desire V face down on a level surface.
If HTC Desire V is already facing down, it will still ring when there are subsequent incoming calls.
Every time you make a call or your friend gives you a ring, you get to see your friend’s latest social network status update right on the call screen. You’ll also see a birthday reminder, if your friend’s birthday will happen within one week.

Viewing a task reminder while on a call
Did you promise to babysit for a friend this weekend? If you associate a task to a contact, you'll see a task reminder on the call screen when you're on a call with that friend.

38 Phone calls · Rejecting a call · Look who's calling

When a call is in progress, you can turn the speakerphone on, place the call on hold, and more.
Putting a call on hold
To put the call on hold, tap
> Hold. The status bar then displays the hold call icon
To resume the call, tap
> Unhold.
If you’re already in a call and you accept another call, you can switch between the two calls.

Turning the speakerphone on during a call
To decrease potential damage to your hearing, do not hold HTC Desire V to your ear when the speakerphone is on.
Do one of the following:
§ Flip HTC Desire V over during a call (be sure that Flip for speaker is selected in Sound settings).
§ On the call screen, tap
appears in the status bar when the speakerphone is on.
To turn the speakerphone off, just flip HTC Desire V over again, facing it up. Or tap
again.
39 Phone calls · Switching between calls · The speakerphone icon

Muting the microphone during a call
On the call screen, tap
to toggle between turning the microphone on or off. When the microphone is turned off, the mute icon
appears in the status bar.
Do one of the following to end the call:
§ On the call screen, tap End Call.
§ Slide open the Notifications panel, then tap
If the phone number of the person who called is not in your contacts list, you can choose to save the number to your contacts list after you hang up.
Conference calling with your friends, family, or co-workers is easy. Make the first call (or accept a call), and then simply dial each subsequent call to add it to the conference.
Make sure your SIM card is enabled with conference calling service. Contact your mobile operator for details.
> Add call, and then dial the number of the second participant. The first participant is put on hold.
, and then dial the number of the contact.
to add the participant to the conference call.
and then select Private call.
To end the call with a participant, tap
and then tap Finish this call.
To end the conference call, tap End Call.
Use Call History to check missed calls, your dialed numbers, and received calls.
Returning a missed call
You'll see the missed call icon
in the status bar when you miss a call.
40 Phone calls · Ending a call

Checking calls in the Call History
> Call History.
§ Tap a name or number in the list to call.
§ Press and hold a name or number in the list to display the options menu.
to check only the call history of a particular contact.
> View to display just a particular type of calls such as missed calls or outgoing calls.
Adding a new phone number to your contacts from Call History
Clearing the Call History list
On the Call History screen, do one of the following:
Remove one name or number
Press and hold the name or number, and then tap Delete from call history.
Clear the entire list Tap
> Remove call history > Select all > Delete.
When you're on a trip abroad, it's easy to dial friends and family from home.
Your home country code is automatically added when you call your contacts while roaming. But when manually entering a phone number to call, you need to enter a plus (+) sign and country code before the number.
Changing the default country code for Home dialing
> Call.
41 Phone calls

Turning off Home dialing
If you prefer to manually enter complete phone numbers to call while roaming, you can turn off Home dialing.
> Call.
You can change the settings of various phone services. Call services may include call forwarding, call waiting, voicemail, and more. Contact your mobile operator to find out about the availability of call services.
> Call.
Tap Preferred Card to set which card slot you'd like to use for most of your calls. The card's name will appear underlined on the Phone dialer screen's call button. The corresponding send button in Messages will also appear underlined when you're composing a new message.
42 Phone calls

About the Messages app
Keep in touch with important people in your life. Use the Messages app to compose and send text and multimedia messages. On the All messages screen, your sent and received messages are neatly grouped into conversations, by contact name or phone number.
> Messages.
Sending the message to a group of friends? Tap
, and then select the contacts to whom you want to send the message.

to save the message as a draft.
§ There is a limit on the number of characters for a single text message (displayed
above the Send button). If you exceed the limit, your text message will be delivered as one but will be billed as more than one message.
§ Your text message automatically becomes a multimedia message if you enter an
email address as the recipient, add a message subject, attach an item, or compose a very long message.
> Messages.
43 Messages

Sending the message to a group of friends? Tap
, and then select the contacts to whom you want to send the message.
> Add subject.
> Attach.
If you don't see the Attach option, scroll down the menu.
to see options for replacing, viewing or removing your attachment.
If you're not ready to send your multimedia message, press
to save it as a draft.
> Attach > Slide.
> Attach, and then choose to add a photo or a video.
> Attach > Audio to add music or a voice recording to a slide.
§ Tap Add text, and then enter your caption.
to see options for replacing, viewing or removing your attachment.
> Preview. Tap once on the preview screen to see playback controls.
If you don't see the Preview option, scroll down the menu.
If you're not ready to send your multimedia message, press
to save it as a draft.
44 Messages · Creating a slideshow

Can't find your contacts' email addresses in Messages?
> Show Email.
To always show email addresses, tap
on the All messages screen, and then tap Settings > General > Show email address.
> Drafts.
Depending on your notification settings, HTC Desire V plays a sound, vibrates, or displays the message briefly in the status bar when you receive a new message. A new message icon
is also displayed in the status bar.
To open and read the message, you can:
§ Open the Notifications panel, and then tap the new message notification.
§ Go to the Messages app and open the message.
Viewing and saving an attachment from a multimedia message
§ If there’s a media attachment such as a photo or video in a received message, tap it to view the content.
§ To save the attachment, tap the multimedia message, and then choose to save from the options menu.
§ If the attachment is a contact (vCard), tap it to view the contact information, then tap Save to add to your contacts.
§ If the attachment is an appointment or event (vCalendar), tap it to choose the calendar where to save it, and then tap Import.
If you are concerned about the size of your data downloads, you can choose to check the size and subject first before you download a multimedia message. On the All messages screen, tap
> Settings > Multimedia messages (MMS). Clear the Auto-retrieve option.
45 Messages

Saving a text message in the Tasks app
Save a text message in your Tasks list so you can remind yourself when to reply.
Replying to another phone number of the contact
When a contact has multiple phone numbers stored on HTC Desire V, you’ll see the particular phone number used below the contact's name.

Keep in mind that your response will be sent to the phone number of the latest message you’ve received from this contact.
, and then select another phone number of this contact.
46 Messages

WAP push messages contain a web link. Often, the link will be to download a file that you have requested from a service provider.
When you receive a WAP push message, a notification icon
is displayed in the status bar.
Opening and reading a new WAP push message
Viewing all your WAP push messages
> Messages.
> Push messages.
You can only see this option if you've previously received WAP push messages.
47 Messages

You can lock a message so that it will not be deleted even if you delete the other messages in the conversation.
is displayed.
Copying a text message to your SIM card
is displayed.
Deleting a single message
Deleting several messages within a conversation
> Delete.
In the Messages settings, tap General > Delete old messages to auto delete old messages per conversation.
48 Messages · Locking a message

Any locked messages in the conversation thread will not be deleted unless you select the Delete locked messages check box.
> Delete.
> Messages.
> Back up SMS > Back up SMS.
You can only restore text messages that were exported using the Back up SMS feature.
> Messages.
> Back up SMS > Restore SMS.

Backing up text messages by email
You need to set up your email account in the Mail app.
> Back up SMS.
The Mail app's compose screen opens, with the backup file attached.
To restore your text messages on HTC Desire V, open the email message with the backup file attachment from the Mail app. Tap the attachment to download it first, and then tap it again to open the backup file to import.
Access and change the settings of the Messages app. You can add a signature to your messages, edit messaging options, and more.
On the All messages screen, tap
> Settings.
50 Messages

51 Search and Web browser
Searching HTC Desire V and the Web
You can search for information on HTC Desire V and on the Web by using Search. Some apps, such as People or Mail, have their own search function, which you can use to search only within those apps.
> Settings.
Performing searches on the Web and HTC Desire V
to enter it in the search box. New suggestions appear and you can enter more text or tap
beside a subsequent suggestion to quickly refine your search.
> Internet.
§ Tap a link to open it, or press and hold a link to see more options.
§ Tap an email address to send a message to the email address.
§ Flick down the screen to quickly show the URL box and other options.
Setting search options

52 Search and Web browser
Switching to Read mode
Want to read an article or blog without distractions? Read mode removes menus, banners, and backgrounds from a webpage.
While viewing a webpage, tap
(when it's available) to switch to Read mode.
To turn Read mode off, tap
Viewing the full version of a website
While viewing a webpage, tap
> View desktop site.
Opening or switching between browser tabs
Open multiple browser tabs to make it easier for you to switch from one website to another.
> Tabs.
§ To open a new tab, tap New tab.
§ To switch to another browser tab, slide your finger until the webpage you want to view appears. Tap a webpage to display it in full screen.

to close a webpage.

53 Search and Web browser
You can use incognito tabs to browse the Web with more privacy. Browser cookies are not shared and deleted when you close all incognito tabs. Pages you view in incognito also won't appear in your browser history except for files you download.
From the browser screen, tap
> Tabs > New incognito tab.
Bookmark a webpage in a normal browser screen (not when you're using an incognito tab).
> Add to .
> New folder.
> Bookmarks.
If you have set up Google Chrome™ sync on your Google Account, tap
on the Bookmarks screen, and then select the Google Account to view for your synced bookmarks.
> Bookmarks.
> Edit.
at the right of the bookmark you want to edit.
Bookmarking a webpage · Opening a bookmark · Editing a bookmark

54 Search and Web browser
Syncing your bookmarks with Google Chrome
Create bookmarks from your computer's Google Chrome browser and sync them on HTC Desire V. For more information about Google Chrome, visit http:// support.google.com/chrome
§ Using your Google Chrome desktop browser, you need to sign in to your Google
Account and set up Google Chrome sync.
§ Be sure that you are logged in to your Google Account every time you save
Google Chrome bookmarks on your computer.
> Accounts & sync.
Save webpages to read later, even without an Internet connection. Some video clips in webpages can also be added to the Watch list so you can quickly find and watch them during your free time.
Only webpages will be stored on HTC Desire V. You need to connect to the Internet when opening linked pages and video clips.
> Add to.
§ To save the webpage to your list, tap Reading list.
§ Tap Watch list if the webpage contains one or more video clips, and then select the videos to add to the Watch list.
Viewing items in your Reading list or Watch list
§ Under Reading list, tap a thumbnail of the webpage you want to open.
§ Under Watch list, tap a thumbnail of the video clip you want to open.
to see more options.
> History.

55 Search and Web browser
Clearing your browsing history
> History.
> Clear all.
Viewing a page that you often visit
> History.
Clearing the list of most visited pages
> History.
> Clear all.
You can download file and apps directly from your favorite websites.
Files and apps downloaded from the Web can be from unknown sources. To protect HTC Desire V and your personal data, we strongly recommend that you download and open only the files you trust.
§ Follow the website's download instructions for apps.
§ Press and hold an image or a web link, and then tap Save link.
Before you can install the downloaded app, you need to set HTC Desire V to allow installation of third-party apps in Settings > Security > Unknown sources.
> Downloads.
Viewing your downloads

56 Search and Web browser
Customize the web browser to suit your browsing style. Set display, privacy, and security options when using the web browser.
From the browser screen, tap
> Settings.
> Settings.
Choosing when to show content compatible with Adobe Flash
Choose which Adobe® Flash content you want to see on a webpage, and when you want to view it.
> Settings.
After selecting On demand, you can show the Adobe Flash content by tapping
on the webpage.
Setting your homepage

57 Photos, videos, and music
Gallery
About the Gallery app
Reminisce on good times. Use Gallery to view all your photos and videos that are on HTC Desire V or your online albums.
You can even:
§ Add photo frames and apply effects.
§ Trim your videos.
§ Share to your social networks, photo sharing sites, and more.
Viewing photos and videos
> Gallery.
While viewing a photo in full screen, tap anywhere on the screen, and then tap More > Show on map to see the location where you took the photo. (Show on map is available when you've enabled Geo-tag photos in Camera.)
Starting a photo slideshow
During the slideshow, tap the screen to show the controls. Tap
to set slideshow preferences.

58 Photos, videos, and music

Taking a photo while watching a video
While you're watching a video in Gallery, tap
to capture a still shot.
Editing your photos and videos
§ Drag the crop box over the part of the photo you want to crop.
§ Press and hold the edge of the crop box. When directional arrows appear, drag your finger inward or outward to resize the crop box.

The cropped photo is saved as a copy. The original photo remains unedited.
Watching a video · Rotating a photo · Cropping a photo

59 Photos, videos, and music
The enhanced photo is saved as a copy. The original photo remains unedited.
Adding custom photo effects
Are the existing photo effects not exactly what you are looking for? You can make your own photo effects in Gallery.
> Gallery.
You can only add effects to photos that are stored locally.
If you do not see any buttons on the screen, tap the screen once to show the buttons.
You can do the following with filters while creating the custom effect:
§ Add more than one filter to create a complex effect.
§ Rearrange filters to modify the effect. Press and hold the filter you want to move.
Then drag it to a new position.
§ Remove filters. Press and hold the filter you want to remove. Then drag it to
Remove.
to add a frame to your photo.
To save your custom effects for future use, tap Save Preset.
Remove unwanted scenes from a video you recorded on HTC Desire V.
Adding photo effects · > · Trimming a video

60 Photos, videos, and music

As you drag a slider, you'll see time markers and video frames. The one in the middle is your start or end frame.
to preview your video.
The trimmed video is saved as a new file. The original video remains unedited.
Viewing photos in your social networks
Right in the Gallery app, check what you and your friends have uploaded to your social networks or photo sharing sites.
Log on to your accounts before you start viewing online photos.
> Gallery.
, and then tap a social network or photo sharing site.
To comment on a photo, press and hold a photo thumbnail and then tap Add comment.
Sending your photos and videos
Send photos and videos to your computer or to another device via email, MMS, or Bluetooth.
Sending photos or videos by email
You can send several photos, videos, or both in an email message. They are added as file attachments in your email.
> Gallery.

61 Photos, videos, and music
(Gmail) or Send (Mail).
If you selected Mail and you have multiple email accounts, the default email account will be used.
Sending a photo or video by MMS
> Gallery.
> Attach and then tap Picture or Video.
Sending photos or videos using Bluetooth
Use Bluetooth to send photos and videos to another device or to your computer.
> Gallery.
You’ll be asked to turn on Bluetooth and connect to the receiving Bluetooth device so the files can be sent.
Sharing your photos and videos on the Web
Use the Gallery app to share photos and videos straight to your social networks. And you can post videos on YouTube.
You can also share a photo or video right after you’ve captured it.
Sharing photos or videos on Facebook
Log in to your Facebook account before you upload photos or videos.
> Gallery.

62 Photos, videos, and music
Tap Add tag and description to enter a caption on each photo or video or tag friends on your photos. If you're sharing several photos or videos, slide to the left to go to the next one. Remember to tap Save after you're done.
Sharing photos and videos on Flickr
Log in to your Flickr® account before you upload photos or videos.
> Gallery.
Tap Add tag and description to enter a caption on each photo or video or tag friends on your photos. If you're sharing several photos or videos, slide to the left to go to the next one. Remember to tap Save after you're done.
Sharing photos on Picasa
Sign in to your Google Account before you upload photos to Picasa™.
> Gallery.
to create a new album.

63 Photos, videos, and music
Sharing videos on YouTube
Upload your videos to YouTube and become an instant sensation.
> Gallery.
Browsing music in the library
You need to copy music files to HTC Desire V first to use the Music app to play music.
> Music > My phone.
to browse a category, such as Artists or Albums.

64 Photos, videos, and music
Enjoy your favorite songs on HTC Desire V using the Music app.

Press and drag your finger across the progress bar to jump to any part of the song.
Show options for adding the song to a playlist, sharing the song, and more.
Turn shuffle on or off. (Shuffle is off when button is gray.)
Cycle through the repeat modes: repeat all songs, repeat current song, and don’t repeat.
Finding music videos on YouTube
It's easy to find music videos of the song you’re listening to on YouTube. On the Now playing screen, tap
> Search > YouTube.
> Update album art.
Playing music from the Lock screen
When you’re listening to music and the screen turns off, press POWER to turn the screen back on and control the music playback directly on the Lock screen.

Listening to music · Updating album covers

65 Photos, videos, and music
You can also pause music playback right from the Notifications panel.
Making your music sound better
When you plug in your headset, HTC Desire V automatically turns on the Beats Audio profile to give you an enhanced sound experience.
To turn the Beats Audio profile on or off, slide the Notifications panel open, and then tap
> Sound > Sound enhancer.
Personalize your music experience by creating music playlists. Make a playlist containing just your favorite songs or create one to match your mood for the day. You can make as many playlists as you like.
> Music > My phone.
> Add to playlist.
If there are no existing playlists, you will be prompted to enter a new playlist name.
You can also add additional songs while creating a new playlist. Tap
> Add songs to add more songs.
Playing the songs in a playlist
> Music > My phone.
> Playlists.
When you tap a song in the list to play it, the Now playing screen is updated with the songs from your playlist.
After creating a playlist, you can add more songs to it, rearrange their order, and more.
> Music > My phone.
> Playlists, and then tap the playlist you want to edit.
Creating a playlist · Managing playlists

66 Photos, videos, and music
> Edit playlist.
Add songs 1. Tap
> Add songs.
to choose a category, and then browse for songs.
Rearrange songs Press and hold
next to the song title you want to move, and then drag it to its new position.
Delete songs Select the songs you want to remove from the playlist.
Type the new name of the playlist in the title text box.
> Music > My phone.
> Playlists.
§ Press and hold the playlist you want to delete, and then tap Delete playlist.
> Delete playlists to remove several playlists.
Setting a song as a ringtone
Pick a song from your Music library and set it as your ringtone or as ringtone for a favorite contact.
> Music > My phone.
> Set as ringtone.
Trimming an MP3 ringtone
Use the Music app's ringtone trimmer if you want to set only a part of the song as ringtone.
> Set as ringtone > Trim the ringtone.
to the part where you want the ringtone to begin and end.
For a more precise trimming, tap the left or right arrow buttons. Time markers indicate where you are on the song.
Change playlist name · Deleting playlists

67 Photos, videos, and music
You can see your new ringtone in the phone settings. Slide open the Notifications panel, and then tap Settings > Sound > Phone ringtone.
Sharing music using Bluetooth
Choose a song from the Music app’s library and use Bluetooth to send it to another device or your computer.
> Music > My phone.
> Share > Share file > Bluetooth.
You’ll be asked to turn on Bluetooth on HTC Desire V and connect to the receiving Bluetooth device so the music can be sent.

68 Accounts and sync
Adding your social networks, email accounts, and more
> Accounts & sync.
Sign in to your Google Account to see your Gmail, contacts, and calendars, and to use Google apps on HTC Desire V.
> Accounts & sync.
If you added more than one Google Account, apps such as Gmail can allow you to switch between your accounts.
Forgot your Google Account password?
If you have forgotten your Google Account password, you can try to recover it by going to the Google website.

69 Accounts and sync
Syncing all your accounts automatically
> Accounts & sync.
Syncing an account manually
> Accounts & sync.
Changing the synced data or settings for an account
> Accounts & sync.
You can remove an account to delete all information associated with it from HTC Desire V. Removing an account does not delete information from the online service itself.
> Accounts & sync.
Removing an account

About the People app
With the People app, easily manage your communications with your contacts via phone, messaging, email, and social networks.
And, if you have the same contacts from different sources, you can merge their contact information so you won't have duplicate entries.
To open People, from the Home screen, tap
> People.
The People app lists all contacts stored on HTC Desire V and from the online accounts you're logged in to.
Your contacts list also displays the contacts stored on your SIM card (marked with
).

You can:
§ View your profile and edit your contact information.
§ Create, edit, or find contacts.
§ See status updates.
§ Tap a name to see that contact's stored information.
§ See a notification icon when a contact has sent you new messages or when it's the contact's birthday.
§ Check out who's online in Google Talk™. Online status icons are displayed if you’re signed in to Google Talk.
70 People

Filtering your contacts list
Choose which account contacts to show.
on the top bar.
To set your contact sorting options, tap
> Settings.
Setting contact search options
In addition to searching contacts by name, you can also search by other criteria such as by their group name or company.
> Settings.
Store your personal contact information to easily send it to other people.
(or the current photo) to change your contact photo.
What you can see on your profile
When you tap My profile, you'll see the following tabs:
Shows your contact details. You'll also see your most recent posts in social networks (if you're signed in to social networks.) You can also edit your profile or share it with others.
Shows the updates that you've posted in your social networks.
Shows your social network albums and photos.

if you want to separately enter the contact's first, middle, and last name. Depending on the contact type, you may also be able to add a name prefix (such as Dr.) or a name suffix (such as Ph.D).
Some fields may not be available when you’re adding contacts to your SIM card.
Finding people you know on social networks
HTC Desire V automatically searches for your phone contacts on different social networks you're signed into. Based on matching email addresses and contact details, you can send requests to your contacts to join your social network.
To turn this feature on or off, tap
> Settings on the People tab, and then select or clear the Find people you know option.
To manually refresh the list of people suggestions, tap
> Manage contacts > Linked contacts. On the Notifications tab, tap
> Refresh.
Sending social network requests to your contacts
Importing contacts from your SIM card
> Manage contacts.
72 People

Importing a contact from an Exchange ActiveSync account
to import the contact.
Copying contacts from one account to another
> Manage contacts.
Contacts from your social network accounts may not be copied.
Avoid duplicate entries by merging contact information from different sources, such as your social network accounts, into one contact.
Manually merging contact information
beside an account to break the link.
73 People · Breaking the link

When you tap a contact on the People screen, the contact details screen opens.
The contact details screen has the following tabs:
Shows the information you've stored for the contact. Get in touch with the contact by tapping an option.
Shows SMS messages and emails you've received from the contact. It also lists all your incoming, outgoing, and missed calls to and from the contact.
Shows the contact’s updates and events from social network accounts.
If you see a notification of the contact’s birthday under the Events section, you can tap the notification and choose how you want to greet your contact.
Shows the linked contact’s albums and photos.
Editing a contact’s information
Social network contacts cannot be edited.
> Delete contacts.

Assign contacts to groups so you can easily send a message or email to a whole group. You can also sync groups on HTC Desire V with the groups in your Google Account, accessible via your computer’s web browser. We’ve also added the Frequent group as a special group type that automatically stores the contacts you dial or get calls from the most.
to select a photo for the group.
> Add contact to group.
Editing a contact group
§ Tap the group name to change the name. You can only change the name for groups that you have created.
§ Tap the icon next to the group name to change or remove the group photo.
> Add contact to group to add more members.
§ To rearrange the group members, press and hold
at the end of the contact’s name, and then drag it to its new position.
beside a contact to remove it from the group.
Sending a message or email to a group
You will be charged for each text message sent. For example, if you send a message to a group of five people, you will be charged for five messages.
75 People · Creating a group

Rearranging your contact groups
> Edit groups.
at the end of the group to move, and then drag it to its new position.
You can only delete groups that you have created.
On the Groups tab, you can:
§ Press and hold a group you want to delete, and then tap Delete group.
> Edit groups to choose several contact groups to remove.
Stay close with the people that matter by adding a people widget for each of your groups.
Setting the default communication method
Choose the communication action (for example, call or send a message) when you tap a contact's photo on the People widget.
If you need to change the default communication method, tap the contact's name (not the photo), and then tap Set default action.
76 People · Deleting groups

Getting in touch with a contact
To send Do this
Press and hold the name of the contact (not the icon or photo), and then tap Send contact as vCard.
Press and hold My profile, and then tap Send my profile.
Sending multiple contact cards
> Send contacts.
> Manage contacts.
77 People · Someone's contact information · Your contact information

You can only restore contacts that were backed up to the storage card using the Export to SD card feature.
> Manage contacts.
78 People · Restoring contacts

Facebook for HTC Sense
Signing in to your Facebook account from the Accounts & sync settings or the Facebook app (preinstalled or downloaded) automatically signs you in to Facebook for HTC Sense. Also, you may need to authorize Facebook for HTC Sense to connect to your Facebook account.
With Facebook for HTC Sense, you can:
§ See your Facebook contacts and their status updates in People.
§ See Facebook photos in Gallery.
§ Check your friends’ Facebook status updates in Friend Stream™.
§ View Facebook events and friends’ birthdays in Calendar.
With Friend Stream, you can share and get updates from friends in popular social networks in a single feed.
From the Home screen, tap
> Friend Stream.
When you tap someone’s status update, you can:
§ Write a comment.
§ Like someone’s Facebook posts.
§ Look at someone’s album photos.
When you tap someone’s photo or name, you can:
§ Check the person’s profile details.
§ Look at the person’s Facebook wall.
to display posts from a particular social network.
Slide to the other tabs to see more options. You can tap
> Edit tabs to customize the Friend Stream tabs.
79 Social

, and then clear the social networks to exclude.
Post your status updates, write messages on walls, or check in to a place.
Posting a message on a friend's Facebook wall
> Facebook.
> My wall.
Commenting on and liking Facebook posts
Tap someone’s status update on the All tab, and do any of the following:
§ Tap a photo or the album name shown in the status update to view and comment on the album photos using the Gallery app.
§ Like the person’s status update.
§ Tap the text box, and then enter what you think about the person’s status update.
Checking in to a place
Let your Facebook friends know where you are by checking in to a place.
In order to find your location, you need to enable location sources in Settings > Location.
80 Social

Google Talk is Google’s instant messaging program. It lets you communicate with other people that also use Google Talk.
To open Google Talk, on the Home screen tap
> Talk.
To learn what you can do and get help in Google Talk, tap
> Help.
With Google+, you can check your friends' updates, post updates of your own, and chat with friends in your Google+ circles.
To open Google+, on the Home screen, tap
To learn what you can do and get help in Google+, tap
> Help.
81 Social · > Google+

Gmail
Viewing your Gmail Inbox
All your received email messages are delivered to your Inbox.
From the Home screen, tap
> Gmail.

Archive, delete or label multiple conversations
Tap the check box before the email message or conversation. Then tap the onscreen buttons at the bottom to choose what to do with the selected messages or conversations.
Display drafts, sent messages, and other labels
Tap Inbox at the top bar and then tap another label (such as Sent, Drafts, or your created label) to view its messages and conversations.
Switch to your other Gmail account
Tap Inbox at the top bar, and then tap the account you want to switch to.
Sending an email message in Gmail
Want to loop in more recipients in a carbon copy (Cc) or blind carbon copy (Bcc) of the email message? Tap
> Add Cc/Bcc.
> Attach file.
to send.
Replying to or forwarding email messages in Gmail
and choose whether to Reply all or Forward.
. Or, tap
82 Email

§ If you're replying to the sender or you selected Reply all, enter your reply message.
§ If you selected Forward, specify the message recipients.
Tap Respond inline if you want to interleave your new message with the received email. But this removes any attachments or formatting in the original email message.
to send.
To find out more about using Gmail, in the Gmail inbox, tap
> Help.
Adding a POP3/IMAP email account
> Mail.
§ If this is the first email account you're adding in Mail, tap Other (POP3/ IMAP) on the Choose a mail provider screen.
§ If you’ve already added an email account in Mail, tap
> New account > Other (POP3/IMAP).
If you’re asked to enter more email settings, ask your email service provider for assistance.
Adding a Microsoft Exchange ActiveSync account
You can sync with Microsoft Exchange Server 2003 Service Pack 2 (SP2) or later.
Add up to 15 Exchange ActiveSync accounts on HTC Desire V.
> Mail.
§ If this is the first email account you're adding in Mail, tap Microsoft Exchange ActiveSync on the Choose a mail provider screen.
§ If you’ve already added an email account in Mail, tap
> New account > Microsoft Exchange ActiveSync.
83 Email · Getting help

If your corporate Exchange Server does not support auto-detect, you’ll need to enter your Exchange Server settings. Ask your Exchange Server administrator for details.
Checking your Mail inbox
When you open the Mail app, it displays the inbox of one of your email accounts that you’ve set up on HTC Desire V.
To switch between email accounts, tap the bar that shows the current email account, and then tap another account.

Viewing the unified inbox of all your email accounts
You can view email messages from all your accounts just in one place without having to switch to different accounts.
Just tap the bar that shows the current email account, and then tap All accounts. Email messages are color coded so you can easily distinguish which email accounts they belong to.
Up to 15 email accounts can be shown in the unified inbox.
Do you have a big pile of email messages in your inbox? Organize your email messages into tabs and quickly find the messages you want.
> Edit tabs.
84 Email · Organizing email messages

and then slide to the added tab.
Manually refreshing an email account
Whatever your sync settings are, you can also sync your sent and received email messages manually at any time.
§ While viewing an email account, tap
> Refresh.
§ If you have several email accounts, you can refresh them all at the same time. Go to the All accounts inbox first. Then tap
> Refresh.
You can sort email messages by date received, priority, subject, sender, or size.
In an email account inbox, tap
> Sort, and select from the sorting options.
To quickly scroll through the message list based on the sorting option you've selected, press and hold two fingers on any email message, and then drag upward or downward.
Sending an email message
> Mail.
Want to loop in more recipients in a carbon copy (Cc) or blind carbon copy (Bcc) of the email message? Tap
> Show Cc/Bcc.
§ Add an attachment. Tap Attach and then choose what you want.
§ Set the priority for an important message. Tap
> Set priority.
Resuming a draft email message
> Folder > Drafts.
85 Email · Sorting email messages

Reading and replying to an email message
> Mail.
If you want to read a particular message inside an email conversation, tap
to expand the conversation, and then tap the email message.
for more actions for the email.
Where are my unread email messages?
Unread email messages display in bold in your inbox. If you're viewing the unified inbox of all your email accounts, color bars also appear next to unread email messages. The color bars also indicate the email account from where the email message is received.
To group all unread email messages, add the Unread tab to your inbox.
> Edit tabs.
, and then tap the Unread tab.
Saving an email message in the Tasks app
Save an email message in your Tasks list so you can remind yourself when to reply.
86 Email

, check the search options, and then tap OK. For example, you can focus the search on a part of an email or filter email messages that have attachments or tagged as high priority.
Tap a result to open the email message.
Searching for emails from a contact
Do you remember the sender, but can't find a particular email from him or her?
Working with Exchange ActiveSync email
To flag an email message inside a conversation, tap
to expand the conversation, and then tap the flag icon of the email message.
Setting your Out of the office status
> Out of the office.
Sending a meeting request
> New meeting invitation.
87 Email · Searching email messages · Flagging an email

Moving email messages to another folder
To select all, select one email message first, and then tap
> Select all.
To select all, select one email message first, and then tap
> Select all.
Switching to other mail folders
> Folder.
Changing email account settings
You can change your email notification settings, add an email signature, delete an account and more.
> Settings.
Syncing email less frequently
When you don't need to sync email frequently, such as when you're watching video or driving, use Smart Sync to automatically extend the time before HTC Desire V syncs your email account. Smart Sync helps you save battery power.
> Settings > Sync, Send & Receive.
88 Email · Managing email messages · Deleting email messages

Smart Sync then extends the email synchronization time after each auto sync time passes and you don't open the Mail app. To sync your email at any time, open the Mail app and check your inbox.
89 Email

About Calendar
Never miss an important date again. Use the Calendar app to schedule your events, meetings, and appointments.
You can set up HTC Desire V to stay in sync with calendars such as Google Calendar, Outlook Calendar, and Microsoft Exchange ActiveSync Calendar.
If you've signed into your social network accounts, related calendar events will appear in Calendar.
You can create events that sync with your Google or Exchange ActiveSync calendars, as well as events on HTC Desire V.
> Calendar.
, and then select the calendar to which you will add the event.
and choose who you want to invite.
§ In any Calendar view, return to the current date by tapping Today.
§ Events in day, week, and agenda views are color coded to indicate which account or type of calendar they belong to. To find out what each color represents, tap
If you don't see a Calendar tab, tap
> Edit tabs, press and hold a Calendar tab, and then drag it to the bottom row.
90 Calendar

In month view, you will see markers on days that have events.
Do any of the following in month view:
§ Tap a day to view the events for that day.
§ Press and hold a day to open an options menu from which you can also choose to create an event or switch to either day or agenda view.
§ Slide your finger up or down the screen to view earlier or later months.
Day and agenda views
Day view shows your events per day, whereas agenda view displays all your events in chronological order.
§ If the event is a birthday or anniversary of your Facebook contact, tap it to send a greeting.
§ When in day view:
§ Press and hold on a time slot to create a new event at that time.
§ Slide left or right across the screen to view earlier or later days.
§ If you see the day's weather shown, tap the weather to change it to display another city.
§ See the event time in another time zone. Tap
> Dual time zone > Choose location, and then enter the second location.
Week view displays a chart of the events of one week.
When in week view, you can:
§ Press and hold on a time slot to create a new event at that time.
§ Tap an event (shown as colored blocks) to view its details.
§ Slide left or right across the screen to view earlier or later weeks.
You can only edit events that you have created.
If you're editing an event that repeats, you'll be asked whether you want to edit just that occurrence or all occurrences of that event.

Do any of the following:
§ While viewing an event, tap
> Delete event.
§ In day, agenda or week view, press and hold an event and then tap Delete or Delete event.
If the event repeats, you’ll be asked whether you want to delete just that occurrence or all occurrences from Calendar.
You can share a calendar event as a vCalendar using Bluetooth or by sending it as a file attachment with your email or message.
§ While viewing an event, tap
> Forward.
§ In day, agenda or week view, press and hold an event and then tap Forward.
Go to the Invites tab to see meeting invitations which you have not yet accepted or declined.
§ You must set up an Exchange ActiveSync account to receive meeting invitations in
Calendar.
§ If you don't see the Invites tab, tap
> Edit tabs, press and hold Invites and then drag it to the bottom row.
to choose from more options, such as moving the invitation to a folder.
92 Calendar · Deleting an event · Sharing an event

Have an important event that you must remember? Calendar makes it easy to remind yourself of important events.
You can set the default reminder time or choose an event reminder tone in the Calendar settings.
If you have set at least one reminder for an event, the upcoming event icon
will appear in the notifications area of the status bar to remind you.
§ Choose to snooze or dismiss all event reminders.
to keep the reminders pending in the notifications area of the status bar.
§ Calendars are kept synchronized on HTC Desire V, even if they are hidden.
§ You can also show or hide tasks that you've created on HTC Desire V.
You can change Calendar settings to specify how it displays events and how it notifies you of upcoming events.
In any Calendar view, tap
> Settings.
93 Calendar · § Press

94 Online storage and services
Dropbox
Using Dropbox on HTC Desire V
When you use Dropbox, you'll always have access to your photos, videos, and documents – on HTC Desire V, your computer, and your other mobile devices where you have Dropbox access.
If the Dropbox app is not preloaded, you can download and install it from Google Play.
On HTC Desire V, sign in to your Dropbox account so you can:
§ Enjoy an additional 23GB of free Dropbox storage for two years.
§ Access your photos and videos that are stored in Dropbox right from Gallery.
§ No more large attachments when sharing by email. Simply send a link to your Dropbox files.
§ View and edit Office documents that are stored in Dropbox.
§ Save documents, such as from email attachments, directly to Dropbox.
§ Check your remaining Dropbox storage space anytime.
§ Search for files. Just include Dropbox as one of the searchable items in Google Search.
About the additional free Dropbox storage offer
The additional 23GB Dropbox storage is a special offer that's available on HTC Desire V and other HTC devices using Android™ with HTC Sense™ 4.0. This offer is available to both new and current Dropbox users.
§ To get the additional 23GB of Dropbox storage free for two years, please sign in to your Dropbox account from HTC Desire V (and not from your computer or other non-HTC devices), and complete the getting started guide on the Dropbox website (www.dropbox.com/gs).
§ If you don't have a Dropbox account yet, you can create a new account from HTC Desire V or from your computer at www.dropbox.com
§ This additional free storage is a one-time offer only. You're eligible to use this offer only on one HTC device.
§ You won't be able to use this offer again if you create or sign in to Dropbox with a different account.

95 Online storage and services
Setting up your Dropbox account
To get your additional 23GB of free Dropbox storage for two years, set up your Dropbox account from HTC Desire V, and complete the getting started guide on the Dropbox website.
> Accounts & sync.
> Dropbox.
From the Home screen, you can also tap
> Dropbox to use the Dropbox app to set up your account.
Sharing your photos and videos on Dropbox
Use Gallery to upload your photos and videos to Dropbox. You can then share the link to your Dropbox so that your friends can see your photos and videos.
Uploading your photos and videos to Dropbox from Gallery
> Gallery.
To view your uploads right from Gallery, put them under the Photos folder in your Dropbox. Or under Photos, create a folder and upload them to this folder.
Auto uploading camera shots
Your new camera shots will be uploaded automatically, if you turned on the Camera Upload feature when you set up your Dropbox account on HTC Desire V. If you didn't turn it on before, you can enable it in the Dropbox settings.
> Dropbox.
> Settings > Turn On Camera Upload.

96 Online storage and services
Viewing your uploaded photos and videos from Gallery
The Camera Uploads folder and subfolders under the Photos folder in your Dropbox can be accessed from Gallery. They will appear as albums.
> Gallery.
> Dropbox.
This message only appears the first time you access your Dropbox photos and videos from Gallery.
Sharing the link to your Dropbox
Share the link to your entire album of photos and videos that's in your Dropbox so other people can access it.
> Dropbox.
Use the Dropbox app if you want to share just a single photo or video. Tap
that appears next to the file, and then tap Share.
Sending the links to Dropbox files by email
No more attaching files to your email. Using the Mail app, you can easily include the links to your Dropbox files and send them in your email.
> Mail.
§ Tap Attach > Document, and then choose a document type.
§ Tap Attach > File if you want to choose any file type.
You'll then see the links to your selected files added to your email message.

97 Online storage and services
Keeping your documents in Dropbox
Saving an Office document to Dropbox
You can open an Office document on HTC Desire V and save it to your Dropbox.
> File > Save as.
Your document will be saved to the Polaris Office folder in the root of your Dropbox folder.
To save the document to another Dropbox folder, tap
> File > Share > Dropbox. Create or select a folder, and then tap Upload.
Editing an Office document in Dropbox
You can edit a document that's stored in your Dropbox and save your changes.
> Dropbox.
> File.
Checking your Dropbox storage space
You can check how much storage space you still have in your Dropbox before you upload more content.
Before your Dropbox storage info appears in settings, you need to access your Dropbox from an app first (such as Gallery) and allow HTC Sense to access your Dropbox.
Slide the Notifications panel open, and then tap
> Storage.
Under Online storage, you'll see your available Dropbox storage.

98 Online storage and services
Unlinking HTC Desire V from Dropbox
You can remotely unlink HTC Desire V from your Dropbox, if you lost your device.
About SkyDrive for HTC Sense
With SkyDrive® online storage, you can keep all your photos and documents in one place. You can access them anytime on HTC Desire V, your computer, and your other mobile device where you have SkyDrive access.
You can:
§ Use Gallery to upload your photos. You'll also be able to access your photos that are stored in your SkyDrive storage.
§ No more large attachments when sharing by email. Simply send a link to your files that are stored in SkyDrive.
§ Use Polaris Office to edit your Office documents that are stored in SkyDrive.
§ Save documents from HTC Desire V directly to your SkyDrive storage.
Signing in to SkyDrive
To use SkyDrive as your online storage, sign in using your Windows Live® ID.
> Accounts & sync.
> SkyDrive for HTC Sense.
Uploading your photos to SkyDrive from Gallery
> Gallery > Albums.

99 Online storage and services
Sending the links to SkyDrive files by email
To share your files stored in SkyDrive by email, you don't need to download them and attach to your message. Using the Mail app, you can easily include the links to your SkyDrive files and send them in your email.
> Mail.
§ Tap Attach > Document, and then choose a document type.
§ Tap Attach > File if you want to choose any file type.
You'll then see the links to your selected files added to your email message.
Keeping your documents in SkyDrive
Saving an Office document to SkyDrive
Using Polaris Office, you can create or open a document and save it to your SkyDrive online storage.
> Polaris Office.
> File > Save as.
After opening a document, you can also tap
> File > Share > SkyDrive for HTC Sense to upload the document to a SkyDrive folder.

100 Online storage and services
Editing an Office document in SkyDrive
Using Polaris Office, you can view or edit a document that's stored in your SkyDrive storage.
> Polaris Office.
> File.

On the road with HTC Car
Now when you drive, you can easily use HTC Desire V to reach your destination, keep you entertained, and help you stay in touch with the people that matter to you. Get easy access to music, maps, navigation, and phone calls with HTC Car.
§ Swipe left or right to go to the other panels such as Music or People.
§ From the main panel, tap a shortcut to do something right away. For example, tapping the Music shortcut immediately plays the last song you were listening to.
When using HTC Car, return to the main panel from any screen by tapping
HTC Car makes it easy to switch back to your regular phone mode. Simply remove your HTC Desire V from HTC Car Kit and HTC Car will automatically exit.
You can also manually close HTC Car by pressing
from the main panel.
to browse music by category or search your collection.
§ Tap the Music shortcut on the main panel to play the last song you were listening to.
§ Swipe back to the Music panel and tap any of the recent albums.
101 HTC Car

Listening to Internet radio with TuneIn
Right from HTC Car, enjoy listening to Internet radio stations with TuneIn.
§ Browse for available stations by category.
to enter and search for stations by keyword such as artist name or topic.
§ Tap the Internet Radio shortcut on the main panel to tune into the last station you were listening to.
§ Swipe back to the Internet Radio panel and tap any of the recent stations.
HTC Car helps you to find your way to where you want to go. Easily access maps and find out your current location. Find nearby attractions on your weekends. HTC Car gives you the information you need so you won't get lost.
Exploring what's around you
Feeling adventurous? With just a few taps, you can find interesting places around you quickly.
Getting directions in HTC Car
By default, HTC Car uses Google Maps™ as the navigation app. In countries where Google Maps doesn't support turn-by-turn navigation, you can set HTC Car to use the HTC Locations app.
Search for a new place Tap
Look up a previously searched place Tap
Get directions for an upcoming event in Calendar Tap
102 HTC Car

Just because you're driving doesn't mean you have to be isolated from the rest of the world. With HTC Car, you can take calls, make calls, and get notifications.
Handling incoming calls in HTC Car
With one simple gesture, you can choose how you want to handle an incoming call.
§ Swipe right to answer.
§ Swipe left to decline.
Making phone calls in HTC Car
§ On the main panel, tap the Phone shortcut to open the dialpad.
§ To make a call from your phonebook, swipe across the screen until you see the People panel. Then slide up from the bottom to go to your phonebook.
Choose your default Bluetooth accessories, set HTC Car to launch automatically, and more.
On the main panel, tap the status icons below the clock.
103 HTC Car

104 Travel and maps
Location settings
Turning on location services
In order to find your location on HTC Desire V, you need to enable location sources.
Uses Wi-Fi or your mobile data connection to find your approximate location.
GPS satellites Finds your GPS location. This requires a clear view of the sky and more battery power.
Search for places of interest, get directions to places you want to go to, and drive using turn-by-turn GPS navigation with Locations. Locations is also your perfect travel companion, whether you’re at home or when you’re in a different country. With Locations, you can download maps beforehand so you don’t have to worry about having an Internet connection while on the road or costly data roaming charges when abroad.
If you are in an area where there are a lot of surrounding buildings, Locations may have a hard time pinpointing your location.
Finding your location and what’s around you
> Locations.
Google's location service · About Locations

105 Travel and maps
Searching for a place of interest
You can search for a name of an establishment, street, or city. Suggested matches will be shown while you type.
If you don't see what you're looking for, tap under Extended search to expand the search.
Searching for an address
> Address.
If you don't see what you're looking for, tap under Extended search to expand the search.
Matching information is displayed.
From the available options, choose to show on map, get directions, and more.
Choosing the map to search from
If you don't have a downloaded map of that country, Locations will search its online maps.

106 Travel and maps
From the Home screen, tap
> Locations. A map opens, showing your current location.

Tap to search for a point of interest or address.
Tap to switch between 2D and 3D views.
Point of interest. Tap to see details, call, get directions, and more.
Your current location.
This icon appears when you're manually controlling the direction of the map with your two fingers.
Zoom buttons. (Tap the screen to show the zoom buttons.)
Quick links Tap to show more tabs, such as Footprints
and Trips.
Choosing which places of interest to show on the map
> View (or More > View).
You can also choose to show or not show footprints and 3D buildings on the map.
Pinning a location on the map
Pin a favorite location on the map and add it as a footprint, get directions to it, or share it with friends.
and then choose what you want to do.
To remove all the pins on the map, while viewing a map, tap
> Clear pin (or More > Clear pin).
Viewing maps

107 Travel and maps
Changing the language of street names and places of interest
> Settings > Map > Map language ( or More > Settings > Map > Map language.
Use native map language
Use this if you want to use the local language of the map. For example, if you are looking at a map of Japan, it will use Japanese characters.
Use language that fits best
Use this if you want to use your current language settings. This may not be available for all maps.
Recording favorite places with HTC Footprints
HTC Footprints™ provides an easy way to record your favorite places and revisit those places. You can take a photo of a location such as a restaurant or sightseeing spot and store it together with its precise GPS location, street address, phone number, and more.
The next time you want to visit the same place, just open the footprint. You can then view the location on the map, search for it on the Web, and more.
Adding a location as a footprint
to fine tune the position of the footprint on the map.
, and then choose the appropriate labels for the location.
§ Tap Capture to take a picture and add it as a photo for the footprint.
> Edit to add a note for the footprint.
> Record voice to add a voice memo to the footprint.
Setting a footprint as your home location
Save your home address as a footprint to make it easier to set it as your destination.

108 Travel and maps
To change your home address at any time, tap
Editing or deleting a footprint
> Delete.
Back up footprints by exporting them. You can also open exported footprints files in other applications such as Google Earth™ on your PC.
> Export.
After exporting, tap Send if you want to share the .kmz file.

109 Travel and maps
Bring back footprints you've previously backed up. You can also import .kmz files that you saved in other applications.
> Import.
You can also tap Photos to import a picture that can have footprint information added to it.
Use Trips to plan your itinerary. Pinpoint places in a city or a country that you want to visit, and then easily get directions from one destination to the next.
> Locations.
> Create a new trip.
, and then search for a place of interest from the available options.
Getting directions to your places of interest
to view the map.
. The map shows the route to places you added, starting from the first item on your itinerary.
§ At the bottom of the screen, tap
to follow the route of your itinerary.
§ Slide the directions bar up, and then tap the instructions to follow the route of your itinerary.

110 Travel and maps
Changed your travel plans? After creating a trip, you can add, reorder, or delete places on it.
> Edit.
at the end of the item you want to move. When the row is highlighted, drag it to its new position, then release.
Delete places 1. Tap
> Edit.
> Delete.
Back up trips by exporting and saving them as .tcz files.
> Export.
To deselect all the trips, tap
> Deselect all.
Exported trips are saved as .tcz files. If you exported multiple trips at one time, they are saved together in one .tcz file.
Bring back trips you previously backed up as .tcz files.
> Import.

111 Travel and maps
Get detailed directions to where you want to go.
Getting directions from your current location
You have footprints saved? You can also set a footprint as your destination. Just go to the Footprints tab, and then choose a footprint.
§ At the bottom of the screen, tap
to follow the route to your destination.
§ Slide up the directions bar, and then tap the instructions to follow the route to your destination.

Getting directions by setting a start and end location
> Directions .
§ At the bottom of the screen, tap
to follow the route to your destination.
§ Slide up the directions bar, and then tap the instructions to follow the route to your destination.
Getting directions · or · or

112 Travel and maps
§ Check if you have purchased turn-by-turn navigation for the country or region
you’re in.
§ To use turn-by-turn navigation, the GPS satellites option in Settings > Location
needs to be selected.
Do you have footprints stored? You can also set it as your destination. Just go to the Footprints tab, and then choose a footprint.
Choose how you want Locations to map your route. You can tell Locations to avoid highways or toll roads, show lane information, choose your route preference, and more.
> Navigator.
Turning off speed and safety camera alerts
If you have the safety camera service, you can choose to turn this service off temporarily.
> Warnings.
Answering a call while using navigation
When a call comes in, the whole map nudges up a bit so you can see the incoming call and answer it. Don’t worry, you’ll still be able to use navigation as we made sure that the call screen just occupies as little space as possible at the bottom of the screen.
Using turn-by-turn navigation · Setting navigation preferences

113 Travel and maps
Check maps, navigation, safety camera information, and voices for turn-by-turn voice instructions that are already on HTC Desire V.
> Locations.
> Get more. On the Purchased tab, you’ll see a list of services that you already have on HTC Desire V.
Downloading maps or purchasing services
Going to a different country for vacation? You can download the map of the country you’re going to for free. You can also download or purchase additional services such as navigation, safety camera, and turn-by-turn voice instructions.
You need to connect to the Internet to download or purchase maps and services.
> Locations.
> Get more.
If you have a voucher code, enter it by tapping Voucher code at the top of the Navigation tab.
Google Maps lets you track your current location, view real-time traffic situations, and receive detailed directions to your destination.
It also provides a search tool where you can locate places of interest or an address on a map, or view locations at street level.
§ To find your location with Google Maps, you need to enable location sources.
§ The Google Maps app does not cover every country or city.
Managing Locations services · About Google Maps

114 Travel and maps
When you open Google Maps, you can easily find your location on the map or check out nearby places by panning and zooming in and out on the map.
To find your location with Google Maps, you need to enable location sources.
> Maps.
shows your current location on the map.
to show your current location. The blue marker
Searching for a location
In Google Maps, you can search for a location, such as an address or a type of business or establishment (for example, museums).
§ Tap a marker
. A balloon then opens, showing the location's name. If that's what you're looking for, tap the balloon.
§ Tap Results list to show the search results as a list, and then tap the location.
Details about the selected location displays on the screen.
After searching on a map, you can clear away the various markers drawn on it.
> Clear Map.
Checking the details of a location
Getting around maps · or · Clearing the map

115 Travel and maps
Searching for a place of interest near you
Use Local to find places of interest near your current location. Local uses Google Maps to search common places that you would want to find, such as the nearest gas station or ATM kiosk.
Before using Local, you need to enable location sources.
> Local.
to enter what you're looking for. When several places are found, the search results appear as a list.
§ Tap Map view to see where these places are on the map.
§ From the search results list, tap a place to view more information.
Get detailed directions to your destination. Google Maps can provide directions for travel by foot, public transportation, or car.
§ Use your current location as the starting point, or enter a location from where to start in the first text box. Then enter your destination in the second text box.
to select an address from your contacts or a point that you tap on a map.
If the place you’ve set as your destination has several locations available, choose which one to go to.
You can also tap the arrow buttons on the map to follow the directions.
When you’re finished viewing or following the directions, tap
to reset the map. Your destination is automatically saved in the Google Maps history.
Getting directions

116 Travel and maps
Finding your friends with Google Latitude (available by country)
Google Latitude® user location service lets you and your friends share locations and status messages with each other. It also lets you get directions to your friends’ locations, send your location details by email, and more.
Your location is not shared automatically. You must join Latitude, and then invite your friends to view your location or accept their invitations. Only friends that you have explicitly invited or accepted can see your location.
Opening and joining Latitude
> Maps.
> Join Latitude.
> Latitude.
§ Open Maps, and then tap
> Latitude.
If you need help or have questions about Maps or Latitude, tap
> Help (or More > Help).
Getting help

Using the Clock
About the HTC Clock widget
Use the HTC Clock widget to see your current date, time, and location. You can also use the Clock to show the time in another city.

Changing the location on the Clock widget
By default, the Clock widget displays your current weather. You can customize the Clock widget on your Home screen to show the weather of another location.
If you don't see the city that you want, tap
to search for it and add it.
You can add more than one Clock widget to the extended Home screen.
About the Clock app
Get more from the Clock app than just the regular date and time. Use HTC Desire V as a world clock to see what time it is in cities across the globe. You can also set alarms or track your time using the stopwatch or timer.
To open the Clock app, tap
from the Home screen, and then tap Clock. Tap the tabs on the bottom row or slide your finger across the tabs to switch between the different functions.
Setting your home city
> Home settings.
117 Essential apps · World Clock settings

Setting the date and time manually
> Local time settings .
Adding a city to the World Clock screen
You can set up one or more alarms.
§ To turn off an alarm, clear the check buttons of that alarm.
§ If you need to set more than three alarms, tap
118 Essential apps · Setting an alarm · Deleting an alarm

Use the Weather app and widget to check the current weather and weather forecasts for the next few days. In addition to your current location, you can view weather forecasts for other cities around the globe.
> Weather. The options for hourly and four-day forecasts are displayed.
§ Swipe your finger up or down the screen to check the weather in other cities.
to update the weather information at any time.
Your settings in the Weather app also control the weather information that is shown in the Clock and Calendar.
Adding a city to the Weather screen
Add more cities to the Weather screen so you can instantly check the weather forecasts in these cities. In addition to your current location, the Weather screen can display up to fifteen cities.
Changing the order of cities on the Weather screen
> Edit.
at the end of the item you want to move, and then drag it to its new position.
Deleting cities from the Weather screen
> Edit.
119 Essential apps

Use Polaris Office to edit Microsoft Office Word (.doc and .docx), Microsoft Office Excel (.xls and .xlsx), Microsoft Office PowerPoint (.ppt and .pptx), and plain text (.txt) files while on the go.
You can also view Microsoft Office PowerPoint Shows (.pps).
From the Home screen, tap
> Polaris Office.
On the Polaris Office main screen, browse to the file that you want to open and open it.
While viewing the file list, tap
to refresh or sort the list.
, and then tap Save .
§ If your file is a Microsoft Office Word, a Microsoft Office PowerPoint, or a plain text document, tap
§ If your file is a Microsoft Office Excel document, tap a cell and then enter your changes in the text box.
If you don't see the toolbar, tap
> Toolbar on.
and then tap either Save or Save as.
to show the other slides and tap the slide that you want to edit.

§ To add another slide, tap
and then choose a layout.
§ To edit text, tap a text box on the presentation twice.
§ To resize an image or a text box, tap it and then drag
§ Use the tool bar at the bottom to continue editing the presentation.
to preview the presentation.
and tap Save or Save As.
§ Tap the formula bar and enter text, figures, or symbols.
§ To enter a function, tap
§ To select multiple cells, tap a cell and then drag
§ To change the format of the text or numerical value, tap a cell and then tap
> Format.
§ To insert a graph, select the information that you want to include in the chart and then tap
> Insert > Chart.
§ Use the tool bar at the bottom of the screen to continue editing the worksheet.
and tap Save or Save As.
Use the Tasks app to organize and track to dos and task lists.
To open the Tasks app, tap
> Tasks.
If you want to create a task and enter the details later, tap
after you've entered the task name.
and then enter the task details.
121 Essential apps · Editing a worksheet · Creating a task

Linking a task to a contact
Helping friends out on a project or event? Link a task to a contact in the People app so that when your friend calls, the task will appear on the screen. You can also filter tasks to show what tasks are associated to a specific contact.
Only tasks under My Tasks can be linked to a contact.
Mark a task complete
Tap the check button next to the task. To view completed tasks, tap
> Completed.
Sort tasks 1. Tap
> Sort.
Edit a task 1. Press and hold the task that you want to edit, and then tap Edit.
Delete a task Press and hold the task that you want to delete, and then tap Delete.
Postpone a task 1. Press and hold an overdue task, and then tap Postpone.
Move a task to another list
You can only move the task to another list that is under the same account.
122 Essential apps · Managing tasks

Viewing the unified task list
You can view and update a unified list of tasks. Tasks are color coded so you can easily distinguish which accounts they belong to.
In the Tasks app, tap
> All accounts.
If you want to view tasks that are stored in HTC Desire V , tap My task.
Creating a task list
> Lists.
, and then choose an account for the list.
Lists can't be created for Microsoft Exchange ActiveSync accounts.
> Lists.
Show or hide tasks or lists
To show all tasks, tap All lists. Tap a specific account and then tap the list that you want to show. Tap All lists under each account to show all the tasks under that account.
Rename a list 1. Tap an account, and then press and hold the list that you want to rename.
Delete a list 1. Tap an account, and then press and hold the list that you want to delete.
123 Essential apps · Filtering tasks · Managing task lists

Backing up or restoring tasks

125 Google Play and other apps
Getting apps from Google Play
Google Play is the place to go to find new apps for HTC Desire V. Choose from a wide variety of free and paid apps ranging from productivity apps, entertainment, to games.
§ A Google Wallet™ payment service is required to purchase a paid app. You will be
asked to confirm method of payment when you purchase an app.
§ The name of the Play Store app may differ depending on your region.
Finding and installing an app
When you install apps and use them on HTC Desire V, they may require access to your personal information or access to certain functions or settings. Download and install only apps that you trust.
Be cautious when downloading apps that have access to functions or a significant amount of your data on HTC Desire V. You’re responsible for the results of using downloaded apps.
> Play Store.
To open the app, tap
on the Home screen. On the All apps screen, tap the app.
You can uninstall an app for a refund within a limited time after your purchase. To know more about the refund policy for paid apps, please visit the Google Play Help site (http://support.google.com/googleplay/).
> Play Store.
> My Apps.
Uninstalling an app

126 Google Play and other apps
If you need help or have questions about Google Play, tap
> Help.
Use the YouTube app to check out what’s popular on the online video-sharing website.
> YouTube.
§ Tap the video screen to pause, resume playback, or drag the slider to jump to a different part of the video.
§ Tap a tab to learn more about the video, see related videos, or check out what other viewers think. You can also slide your finger across the tabs to see if there are more items available.
Tap the YouTube icon to return to the main screen.
on the onscreen keyboard.
You also have the option to show results that were just recently posted. Tap All time, and then select a time period you want.
Clearing the search history
> Settings.
Sharing a video link
Getting help · Searching for videos

127 Google Play and other apps
Use Voice Recorder to capture information during lectures, interviews, or even to create your own audio log.
> Voice Recorder.
to start recording a voice clip.
Voice Recorder can run in the background while you do other things on HTC Desire V, except when you open other apps that also use audio functions.
to stop recording.
To play back the voice clip, tap
To show options for deleting or renaming the voice clip, tap
Setting a voice clip as a ringtone
Having fun with a game or app that you found from Google Play? Share your favorite games and apps instantly with your circle of friends.
For your friends to link to the app and download it from Google Play, they must be using an Android device.
> Share.

128 Your phone and computer
Where apps, data, and files are stored
HTC Desire V uses these storage types:
Apps and data storage
Apps are installed to this storage, labeled as Internal storage in your phone settings. It also stores data such as your text messages, contacts you created or synchronized to your phone, account settings, and more.
This storage is managed and carefully guarded by your phone since it contains your private information. When you connect your phone to your computer, this storage is not accessible from your computer.
Storage contents will be erased when you do a factory reset. Make sure to back up your data before starting a factory reset. Some apps allow you to back up to your storage card, such as People.
You can store your files such as photos, music, and videos to this removable storage.
When you connect your phone to your computer, this storage is accessible and you can copy files between them.
Whenever you connect HTC Desire V to a computer using the USB cable, the Choose a connection type screen opens and lets you choose the type of USB connection.
Select one of the following choices, and then tap Done:
Charge only Select this option if you only want to charge the battery while connected to your computer.
Disk drive This mode is available only when there’s a storage card installed on HTC Desire V. Select this mode when you want to copy files between the storage card and your computer.
When Disk drive mode is enabled while HTC Desire V is connected to the computer, you will not be able to use apps on HTC Desire V to access the storage card.
Storage card

129 Your phone and computer
Select this option to sync media and your data such as contacts, calendar, bookmarks, and other information between your computer and HTC Desire V.
Download and install HTC Sync Manager, when available, from our website. Or in the meantime, download and use the latest version of HTC Sync to sync your media and data.
When you do not have an Internet connection on your computer, you can select this mode to share the mobile data connection of HTC Desire V with your computer.
If you don’t have a data plan or you don’t have access to a Wi-Fi network, you can select this mode to share your computer’s Internet connection with HTC Desire V.
You can copy your music, photos, and other files to the storage card.
§ Copy the files from the computer to the storage card’s root folder.
§ Copy the files from the storage card to a folder in your computer.
§ Disconnect HTC Desire V from the computer.
§ If you want to keep HTC Desire V connected to the computer but want it to be able to access the storage card, open the Notifications panel, tap Disk drive, select an option except Disk drive, and then tap Done.
Download and install HTC Sync Manager, when available, from our website. Or in the meantime, download and use the latest version of HTC Sync to sync your media and data.
HTC Sync Manager · USB tethering · Internet pass-through

130 Your phone and computer
Installing HTC Sync Manager
Before you install, please visit our HTC website to check the system requirements for HTC Sync Manager.
Installing on a Windows computer
§ For trouble-free installation, first quit all running programs and temporarily exit
from your anti-virus program before you start installing HTC Sync Manager.
§ You need to have administrator rights if you're installing HTC Sync Manager on
Windows Vista® or later versions.
If there's no HTC Sync Manager found on your computer, your web browser will automatically open and take you to our HTC website.
The first time you open HTC Sync Manager, the Getting Started window opens, allowing you to add media to your library.
Automatically discover Media on My PC
Automatically search for all music, photos, and videos on your computer and add them to your HTC Sync Manager library.
Manually Import or Add Media from My PC
Choose folders to import media files from. You can also inport media files and playlists from other media applications.
Getting started

131 Your phone and computer
The HTC Sync Manager main screen
From the main screen, you can see your media libraries and play your media. You can also sync with HTC Desire V when it's connected, or rip music when there's a CD inserted on your computer.
§ Click Music or Gallery to switch between these two libraries. While you're in one of these libraries, click
to return to the previous screen.
§ Play a music track or video. Use the controls at the bottom center of the screen to control the playback.
to change settings, check for software updates, and more.
opens a menu, showing a list of connected devices.
§ If HTC Desire V is connected to your computer, click it on the menu to set up how you want to sync media and data.
§ If you inserted a music CD, click the disc drive on the menu to rip music from the CD.
Importing more media to the library
To import more media to your HTC Sync Manager library, there are several easy ways you can do this.
§ Click Music > LIBRARY, and then drag a folder (or any music file inside that folder) to the LIBRARY screen.
§ Click Gallery > ALBUMS, and then drag a folder (or any photo or video file inside that folder) to the ALBUMS screen.
§ Set up HTC Sync Manager to check for new music, photos, and videos from selected folders on your computer and import them to your library automatically.
When you drag a folder or media file, the whole folder will be added as an album to the library. The folder path will also be added to the list of watched folders in the settings.
§ Click · § Clicking

132 Your phone and computer
Adding new media to your library automatically
You can set HTC Sync Manager to automatically add media to your library whenever there are new music, photos, or videos on your computer. Simply add the folders to the Watched Folder in settings that you want HTC Sync Manager to check for new media.
> Settings.
§ Click Add to choose folders that you want HTC Sync Manager to check for new music files.
§ Click Import to choose what other media applications on your computer (such as iTunes and Windows Media Player) you want to import music from.
§ Click Import playlist to get playlists from other media applications.
Checking for new software updates
> Check for updates.
You'll need to close HTC Sync Manager when you're prompted, and then reopen the application after the installation is complete.

133 Your phone and computer
What file formats are supported by HTC Sync Manager?
Video formats and codecs § 3GP and 3G2 (3rd Generation Partnership Project)
Audio formats and codecs § AAC and M4A (Advanced Audio Coding)
§ FLAC (Free Lossless Audio Codec)
§ AAC and M4A (High Efficiency AAC v1 and v2)
§ MP3 (MPEG-1 Audio Layer 3)
§ WAV (Resource Interchange File Format)
§ WMA (Windows Media Audio)
Image formats § BMP
§ JPEG and JPG
WMA and WAV formats are only supported in Windows.
Are you a music junkie with a big collection of digital music on your computer? Manage your music library and enjoy listening to your favorite songs from HTC Sync Manager.
§ At the bottom-left side of the screen, drag the progress bar slider
to jump to any part of the song.
§ Switching to another screen will not stop music playback. You'll see the song title
and album that's currently playing at the bottom of the screen.
Creating a playlist

134 Your phone and computer
To send just a single playlist to HTC Desire V, right-click the playlist, click Send to phone, and then choose the device name. (Be sure that HTC Desire V is connected to your computer.)
Browse through and view your computer's photos and videos that you've imported to the HTC Sync Manager Gallery.
next to Sort by and choose how you want to arrange your photos and videos.
To move several photos or videos to another album, mouse over and select the check button of each photo or video you want to move. Then click Move to album.
You can do basic photo edits such as cropping and rotating.
Editing your photos

135 Your phone and computer
. A screen then opens, showing a thumbnail strip of all your selected photos.
Click Detail to see information such as resolution, file format, and more.
Rotate Click Rotate right or Rotate left.
Crop 1. Click Crop, and then resize or drag the crop box to the part of the photo you want to crop.
You can also click Custom, and then select a preset photo size.
To send just one edited photo to HTC Desire V, click Send to phone, and then choose the device name. (Be sure that HTC Desire V is connected to your computer.)
and then click your device name.
See photo information

136 Your phone and computer
You can set up HTC Sync Manager to sync music files and playlists between HTC Desire V and your computer.
next to the Music item.
Import new music from device
Select this option to import new music found on HTC Desire V to HTC Sync Manager. The music files will be copied to the folder specified in the Import settings.
Sync music to device
Select this option to sync music from your computer to HTC Desire V. Choose to sync All Music or only Selected Playlists.
Syncing photos and videos
next to the Gallery item.
Copy device photo and video
Select this option to import new photos and videos from HTC Desire V to HTC Sync Manager. The photos and videos will be copied to the folder specified in the Import settings.
Sync albums to device
Select this option to sync Gallery albums from HTC Sync Manager to HTC Desire V. Choose to sync All Albums or only Selected Albums.
Syncing documents and email attachments
To sync email attachments received on HTC Desire V to your computer, you must set up an Exchange ActiveSync or POP3/IMAP email account from the Mail app on HTC Desire V.
next to the Calendar item.
Syncing music

137 Your phone and computer
Set up HTC Sync Manager to sync HTC Desire V with your Outlook, Outlook Express, or Windows Contacts.
You can sync HTC Desire V with the following Outlook versions: Outlook XP, Outlook 2003, Outlook 2007, and Outlook 2010.
If you have contacts to sync from your SIM card with your computer, you have to import them first to HTC Desire V storage.
next to the People item.
Only the contact fields that are in the People app of HTC Desire V will be synced.
Syncing your calendar events
Set up HTC Sync Manager to sync HTC Desire V with your Outlook Calendar or Windows Calendar on your computer.
You can sync HTC Desire V with the following Outlook versions: Outlook XP, Outlook 2003, Outlook 2007, and Outlook 2010.
next to the Calendar item.
Only the data fields that are in HTC Desire V Calendar will be synced.
Syncing your contacts

138 Your phone and computer
Syncing your web bookmarks
next to the Bookmarks item.

139 Your phone and computer
§ Before you start syncing, check and make sure HTC Desire V is connected to your
computer and is recognized by HTC Sync Manager.
§ To avoid sync problems, be sure to close all browser windows before you start
syncing web bookmarks.
§ When conflicting bookmarks are found on both HTC Desire V and your computer,
HTC Sync Manager keeps the information from your computer.
After you've finished setting up all the items you want to sync in HTC Sync Manager, click the Sync button on the Synchronize Settings screen to start syncing HTC Desire V and your computer.
In HTC Sync Manager, you can play and rip audio CDs, that you can later sync with HTC Desire V.
HTC Sync Manager prompts you that a new disc is inserted. Click OK to show the disc contents.
You can also click
, and then select the name of the CD inserted.
§ You'll see this icon
beside the music track when ripping is in progress or this icon
if the music track is in the queue.
§ When ripping music is complete, audio files are imported to your computer, and this icon
appears beside the selected tracks.
To check where the ripped music tracks are saved, click
> Settings > Rip CD.

140 Your phone and computer
No Internet connection available for your computer? No problem. Use the data connection of HTC Desire V to connect to the Internet.
§ Make sure your SIM card is inserted on HTC Desire V.
§ Install HTC Sync or HTC Sync Manager on your computer first.
§ You may need to have USB tethering added to your data plan, and it may incur
additional cost. Contact your mobile service provider for details.
If you temporarily don’t have Internet access, you can still go online by using your computer’s Internet connection.
Install HTC Sync or HTC Sync Manager on your computer first.
Two things to check for your computer’s Internet connection. One, you may need to turn off your local network’s firewall. Two, if your computer connects to the Internet via PPP (e.g. Dial UP, xDSL, or VPN), Internet Pass-through will only support TCP protocol.

Data connection
When you turn on HTC Desire V for the first time, it will be automatically set up to use your mobile operator's data connection (if the SIM card is inserted).
Checking the data connection you're using
Turning the data connection on or off
Turning your data connection off saves battery life and money on data charges.
If you don’t have the data connection turned on and you’re also not connected to a Wi-Fi network, you won’t receive automatic updates to your email, social network accounts, and other synchronized information.
Adding a new access point
Have the access point name and settings from your mobile operator ready (including username and password if required).
> New APN.
> Save.
141 Internet connections

Connect to your mobile operator’s partner networks and access data services when you’re out of your mobile operator’s coverage area.
Using data services while roaming may be costly. Check with your mobile operator for data roaming rates before you use data roaming.
Select the Data roaming sound option if you’d like HTC Desire V to play a sound so you’ll know when it’s connecting to a roaming network.
To use Wi-Fi, you need access to a wireless access point or “hotspot”.
The availability and strength of a Wi-Fi signal varies depending on objects the Wi-Fi signal has to pass through (such as buildings or a wall between rooms).
Turning Wi-Fi on and connecting to a wireless network
Detected Wi-Fi networks will be listed.
If the wireless network that you want is not listed, tap
> Add network to manually add it.
If you selected a secured network, you'll be asked to enter the network key or password.
When HTC Desire V is connected to the wireless network, the Wi-Fi icon
appears in the status bar and tells you the approximate signal strength.
The next time HTC Desire V connects to a previously accessed secured wireless network, you won’t be asked to enter the key or other security information again, unless you reset HTC Desire V to its factory default settings.
142 Internet connections · Enabling data roaming

Disconnecting from the current wireless network
§ Tap the wireless network that HTC Desire V is connected to, and then tap Disconnect.
§ If you want to remove the settings for this network, press and hold the network name, and then tap Forget network.
Connecting to a different Wi-Fi network
To manually scan for available Wi-Fi networks, tap
> Scan.
Connecting to a Wi-Fi network using enhanced security
You may need to install a network certificate (*.p12) to HTC Desire V before you can connect to a Wi-Fi network with EAP-TLS authentication protocol.
> Security.
Add virtual private networks (VPNs) so you can connect and access resources inside a secured local network, such as your corporate network.
Depending on the type of VPN you’re using at work, you may be asked to enter your login credentials and install security certificates before you can connect to your company’s local network. You can get this information from your network administrator.
Also, HTC Desire V must first establish a Wi-Fi or data connection before you can start a VPN connection.
143 Internet connections

Adding a VPN connection
You must first set a lock screen PIN or password before you can use credential storage and set up the VPN.
The VPN is then added to the VPNs section of the VPN settings screen.
Connecting to a VPN
appears in the notification area of the title bar.
You can then open the web browser to access resources such as your corporate network intranet.
Disconnecting from a VPN
Share your data connection with other devices by turning HTC Desire V into a wireless router.
§ Make sure the data connection is turned on.
§ You must have an approved data plan associated with your account from your
mobile service provider to use this service.
144 Internet connections

The password is the key other people need to enter on their device so they can connect and use HTC Desire V as a wireless router.
HTC Desire V is ready to be used as a wireless router when you see
on the status bar.
145 Internet connections

Bluetooth basics
Turning Bluetooth on or off
Turn off Bluetooth when not in use to save battery power, or in places where using a wireless device is prohibited, such as on board an aircraft and in hospitals.
Changing the device name
The device name identifies HTC Desire V to other devices.
, and then tap Rename phone.
You can listen to music over a Bluetooth stereo headset, or have hands-free conversations using a compatible Bluetooth headset or car kit.
§ To listen to music with your headset or car kit, the headset or car kit must support
the A2DP Bluetooth profile.
§ Before you connect your headset, make it discoverable so HTC Desire V can find it.
Refer to your headset manual for details.
, and then tap Search for devices to refresh the list.
146 Bluetooth

The pairing and connection status is displayed below the hands-free headset or car kit name in the Bluetooth devices section. When the Bluetooth headset or car kit is connected to HTC Desire V, the Bluetooth connected icon
is displayed in the status bar.
Reconnecting a headset or car kit
Normally, you can easily reconnect your headset by switching on Bluetooth on HTC Desire V, and then turning on the headset. However, you might have to connect manually if your headset has been used with another Bluetooth device.
Make sure that the headset is discoverable. Refer to the headset manual for details.
If you still cannot reconnect to the headset or car kit, follow the instructions in Unpairing from a Bluetooth device on page 148, and then follow the steps under Connecting a Bluetooth headset or car kit on page 146.
Disconnecting a Bluetooth device
Tap the name of the device to reconnect it.
147 Bluetooth

Unpairing from a Bluetooth device
next to the device to unpair.
Before you begin, set the receiving device to discoverable mode. You may also need to set it to “Receive Beams” or “Receive Files”. Refer to the device’s documentation for instructions on receiving information over Bluetooth.
Contact 1. In the People app, tap a contact to view the contact's details.
and then tap Send contact.
Calendar appointment or event
In Day view, Agenda view, or Week view, press and hold the event, and then tap Forward > Bluetooth.
Photos or videos 1. In the Gallery app, choose an album.
Captured photo or video
After capturing, on the Camera preview screen, tap
> Bluetooth. (Note that you must have first set a review duration in Camera settings.)
Music track With the track displayed on the Music app’s Now playing screen, tap
> Share > Share file > Bluetooth.
Voice recording On the main Voice Recorder screen, tap
> Bluetooth.
Browser § On a webpage you want to share, tap
> Share page > Bluetooth.
§ While viewing a webpage in Reading mode, tap
> Bluetooth.
148 Bluetooth

Where sent information is saved
When you send information using Bluetooth, the location where it's saved depends on the type of information and the receiving device.
If you send a calendar event or contact, it is normally added directly to the corresponding application on the receiving device.
If you send another file type to a Windows computer, it is normally saved in the Bluetooth Exchange folder within your personal document folders.
§ On Windows XP, the path may be: C:\Documents and Settings\[your username]\My Documents\Bluetooth Exchange
§ On Windows Vista, the path may be: C:\Users\[your username]\Documents
§ On Windows 7, the path may be: C:\Users\[your username]\Documents \Bluetooth Exchange Folder
If you send a file to another device, the saved location may depend on the file type. For example, if you send an image file to another mobile phone, it may be saved in a folder named “Images”.
HTC Desire V lets you receive various files with Bluetooth, including photos, music tracks, contact info, calendar events, and documents such as PDFs.
Refer to the device’s documentation for instructions on sending information over Bluetooth.
You'll then get a Bluetooth authorization request.
149 Bluetooth

When you open a received file, what happens next depends on the file type:
§ Media files and documents are usually opened directly in a compatible app. For example, if you open a music track, it starts playing in the Music app.
§ For a vCalendar file, choose the calendar where you want to save the event, and then tap Import. The vCalendar is added to your Calendar events.
§ For a vCard contact file, you can choose to import one, several, or all of those contacts to your contacts list.
150 Bluetooth

151 Settings and security
Turning Airplane mode on or off
In many countries, you are required by law to turn off wireless devices while on board an aircraft. A way to turn off wireless functions quickly is to switch HTC Desire V to Airplane mode.
When you enable Airplane mode, all wireless radios on HTC Desire V are turned off, including the call function, data services, Bluetooth, and Wi-Fi However, you can manually turn Bluetooth and Wi-Fi on while Airplane mode is enabled.
When you disable Airplane mode, the call function is turned back on and the previous state of Bluetooth and Wi-Fi is restored.
If USB tethering is turned on, enabling Airplane mode will turn it off. You will need to manually turn USB tethering on after you disable Airplane mode.
Do any of the following to turn Airplane mode on or off:
§ Press and hold POWER, and then tap Airplane mode.
§ Slide the Notifications panel open, and then tap
. Tap the Airplane mode On/ Off switch to turn it on or off.
When enabled, the Airplane mode icon
is displayed in the status bar.
Adjusting the screen brightness manually
Adjusting the time before the screen turns off
After a period of inactivity, the screen turns off to conserve battery power. You can set the idle time before the screen turns off.

152 Settings and security
Turning automatic screen rotation off
Automatic rotation is not supported in all applications.
Recalibrate the screen if you feel that the screen orientation does not respond properly to the way you hold HTC Desire V.
Keeping the screen on while charging
Switching animation effects on or off
Switching between silent, vibration, and normal modes
Do one of the following:
§ To change from silent to normal mode, press the VOLUME UP button.
§ To change from vibration to normal mode, press the VOLUME UP button twice.
§ From the Home screen, slide the notifications panel open and then tap
> Sound > Sound profile.
Recalibrating the G-sensor

153 Settings and security
Playing a sound when selecting onscreen items
Lowering the ring volume automatically
HTC Desire V has a quiet ring feature that automatically lowers the ring volume when you move it.
Making HTC Desire V ring louder in your pocket or bag
To help avoid missing incoming calls when HTC Desire V is in your pocket or bag, the pocket mode feature gradually increases the ring volume and vibrates when you receive a call.
Switching to speakerphone automatically
When you're in a call, you can switch to speakerphone by simply flipping HTC Desire V over.
Changing the language adjusts the keyboard layout, date and time formatting, and more.
The languages available to choose from may depend on the version of HTC Desire V you have.

154 Settings and security
Switching to GSM network mode
Switch to using GSM network if you’re not using a data connection to connect to the Internet. Connecting to GSM network mode consumes less battery power.
If you see buttons while viewing the Use details screen, you can tap them to adjust the settings that affect battery usage or to turn off the feature that's consuming battery.
You can choose to automatically back up some settings such as Wi-Fi and bookmarks to Google servers using your Google Account so you can restore them when needed.
Use these settings when you’ve downloaded and installed an accessibility tool, such as a screen reader that provides voice feedback. You can turn accessibility functions or services on or off.
Checking battery usage

155 Settings and security
Add another layer of security for HTC Desire V by assigning a PIN (personal identification number) to your SIM.
Make sure you have the default SIM PIN provided by your mobile operator before continuing.
> Security.
Restoring a SIM card that has been locked out
If you enter the wrong PIN more times than the maximum number of attempts allowed, your SIM card will become “PUK-locked.”
You need a PUK code to restore access to HTC Desire V. Contact your mobile operator for this code.
Protect your personal information and prevent others from using HTC Desire V without your permission by setting a screen lock pattern, PIN, or password.
You'll be asked to unlock the screen every time HTC Desire V is turned on or when it’s idle for a certain period of time.
> Security.
You can also clear Make pattern visible or Make passwords visible if you don’t want your screen lock to display as you enter it onscreen.

156 Settings and security
Forgot your screen lock pattern?
If you’ve forgotten your screen lock pattern, you have up to five attempts to try and unlock HTC Desire V.
If this fails, you can unlock HTC Desire V by entering your Google Account user name and password.
You can encrypt data such as your online accounts, settings, music files and other media. After encryption, you will need to enter the screen lock PIN or password to turn on your phone and access the data.
§ Set a lock screen PIN or password before encrypting your data.
§ Fully charge the battery and keep HTC Desire V connected to the power adapter
during encryption. The encryption process takes about an hour.
§ You cannot undo encryption. If you want to return to an unencrypted phone, you
must perform a factory reset.

157 Settings and security
Encryption starts and the progress is displayed. The phone may restart a few times.
When the encryption process is complete, enter your PIN or password.
§ Turn either network on or off.
§ Assign custom names to the slots.
§ Choose your preferred network for your data connection.
§ Turn Airplane mode on or off.

158 Settings and security
Checking how much phone memory is available for use
Checking the available storage card space
Making more storage space (internal storage)
Easily free up space in internal storage by cleaning up the application cache, moving or uninstalling apps, and deleting old mails and messages all in one go.
You cannot move or uninstall preinstalled apps.
§ Set fewer days of mails to download so that older mails will be removed from the storage automatically.
§ Lower the number of text and multimedia messages per conversation.
Clearing application cache and data
You can delete the data or clear the cache per application.

159 Settings and security
You cannot uninstall an app that's preinstalled on HTC Desire V.
Moving an app to or from the storage card
You cannot move an app that's preinstalled on HTC Desire V.
Stopping running applications using Task Manager
Use Task Manager to free up memory by stopping running applications that you're not currently using.
> Task Manager.
to the right of the application name to stop it.
Uninstalling an app

Status icons
Battery is low (20% remaining)
Battery is very low (8% or less remaining)
Wired microphone headset connected
Connected to a Bluetooth device

No SIM card installed
Connected to a Wi-Fi network
When you start an app or select a field that requires text or numbers, the onscreen keyboard becomes available. After entering your text, you can tap
to close the onscreen keyboard.
Selecting a keyboard layout
You can choose from three different keyboard layouts to suit your typing style.
> Language & keyboard.
Standard This layout is similar to a desktop computer keyboard. This is the
default keyboard layout.
Phone This layout resembles the traditional mobile phone keypad.
Compact This layout features two letters on each key. The key size is slightly
bigger than on the Standard layout.
Simply tap the keys on the onscreen keyboard to enter letters and numbers, as well as punctuation marks and symbols.
to enter an uppercase letter. Tap twice to turn on caps lock.
§ Press and hold keys with gray characters at the top to enter numbers, symbols, or accented letters. The gray character displayed on the key is the character that will be inserted when you press and hold that key. Some keys have multiple characters or accents associated with them.

Choosing multiple keyboard languages
If multiple keyboard languages are available on HTC Desire V, you can choose which languages to enable in the onscreen keyboard.
> Language & keyboard.
Available languages depend on the region where you purchased HTC Desire V.
Changing the keyboard language
until you see the language you want to use.
To turn Toggle keyboards on or off, slide the Notifications panel open, and then tap
> Language & keyboard > HTC Sense Input and tap the Toggle keyboards On/ Off switch.
Predictive text input is enabled by default, and word suggestions are displayed as you type.
to switch between Multitap and XT9 predictive modes when using the Compact or Phone keyboard layout.
To enter a word in predictive mode, do any of the following:
§ If the word you want is highlighted in green or orange in the suggestion list, just tap the space bar to insert the word into your text.
§ If the word you want shows up in the suggestion list before you finish typing the entire word, tap the word to insert it into your text.
§ If there's an arrow to the right of the suggestion list, tap the arrow to see more choices.
162 Other essentials

Setting a second language for predictive text
You can set the predictive text to be bilingual. As you type, you’ll get word suggestions in the languages that you’ve selected.
> Language & keyboard.
Adding a word to the predictive text dictionary
While you're entering text using the Standard keyboard layout, any word you tap on the suggestion list is automatically added.
You can also add a word to the list manually.
> Language & keyboard.
Editing or deleting a word in the predictive text dictionary
> Language & keyboard.
§ To edit a word, tap the word.
§ To delete words from the dictionary, tap
> Delete. Select the words you want to remove, and then tap Delete.
Backing up your personal dictionary to your storage card
If you have a storage card installed, you can back up the new words you’ve added to the predictive text dictionary.
> Language & keyboard.
Importing your personal dictionary from your storage card
> Language & keyboard.
163 Other essentials

No time to type? Try speaking the words to enter them.
Since HTC Desire V uses Google’s speech-recognition service, you need to be connected to the Internet to enter text by speaking.
To set the voice input language, tap the language bar below the microphone image. You can choose one or more languages. Available languages depend on the voice input languages supported by Google.
If HTC Desire V is running slower than normal, an application is not performing properly, or HTC Desire V becomes unresponsive, try restarting HTC Desire V and see if that helps solve the problem.
If these steps don't work, you can remove and reinstall the battery, and then turn HTC Desire V on to restart it.
If you’re passing HTC Desire V on to someone else or HTC Desire V has a persistent problem that cannot be solved, you can perform a factory reset (also called a hard reset).
Factory reset will permanently delete all your data and customized settings, and will remove any applications you’ve downloaded and installed. Be sure to back up any data and files you want to keep before you do a factory reset.
164 Other essentials

Performing a factory reset from settings
Performing a factory reset using hardware buttons
If you can’t turn HTC Desire V on or access settings, you can still perform a factory reset by using the hardware buttons on HTC Desire V.
165 Other essentials

166 Trademarks and copyrights
©2012 HTC Corporation. All Rights Reserved.
HTC, the HTC logo, the HTC quietly brilliant logo, HTC Desire, Friend Stream, HTC Footprints, and HTC Sense are trademarks or service marks of HTC Corporation.
Google, the Google logo, Android, the Android logo, Android Market, Google Apps, Google Calendar, Google Checkout, Google Earth, Google Latitude, Google Maps, Google Play, Google Talk, Google Wallet, Gmail, Picasa, and YouTube are trademarks of Google Inc.
Microsoft, Windows, ActiveSync, Excel, Outlook, PowerPoint, SkyDrive, Windows Media, and Windows Vista are either registered trademarks or trademarks of Microsoft Corporation in the United States and/or other countries.
The Bluetooth® word mark and logos are registered trademarks by Bluetooth SIG, Inc.
Adobe and Flash are either registered trademarks or trademarks of Adobe Systems Incorporated in the United States and/or other countries.
Wi-Fi® is a registered trademark of the Wireless Fidelity Alliance, Inc.
microSD is a trademark of SD-3C LLC.
Beats, BeatsAudio, and the b logo are trademarks of Beats Electronics, LLC.
Facebook is a trademark of Facebook, Inc.
FLICKR and the FLICKR Dots logo are the trademarks and/or registered trademarks of Yahoo! Inc.
iTunes and Mac are trademarks of Apple Computer, Inc.
Polaris Office is a trademark of Infraware, Inc.
All other company, product and service names mentioned herein are trademarks, registered trademarks or service marks of their respective owners.
Screen images contained herein are simulated. HTC shall not be liable for technical or editorial errors or omissions contained herein, nor for incidental or consequential damages resulting from furnishing this material. The information is provided “as is” without warranty of any kind and is subject to change without notice. HTC also reserves the right to revise the content of this document at any time without prior notice.
No part of this document may be reproduced or transmitted in any form or by any means, electronic or mechanical, including photocopying, recording or storing in a retrieval system, or translated into any language in any form without prior written permission of HTC.


Pages referenced in this manual — manufacturer, support and downloads.
Owners and our team usually reply within a day — and your question helps the next person too.
Be the first to ask — other owners or our team will answer.


